Toasted Almond and Pecan Frangipani

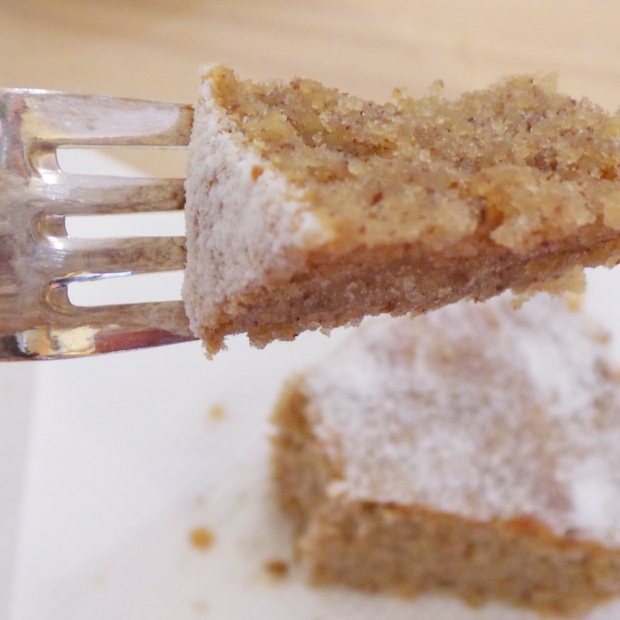
A Dainty Dessert without the fuss…..”Sounds like my type of recipe”

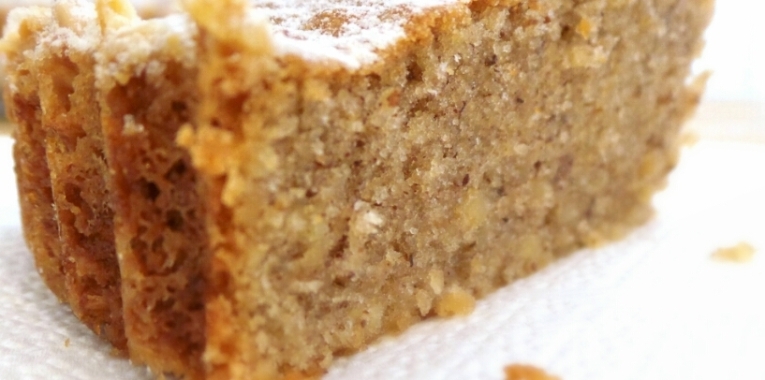
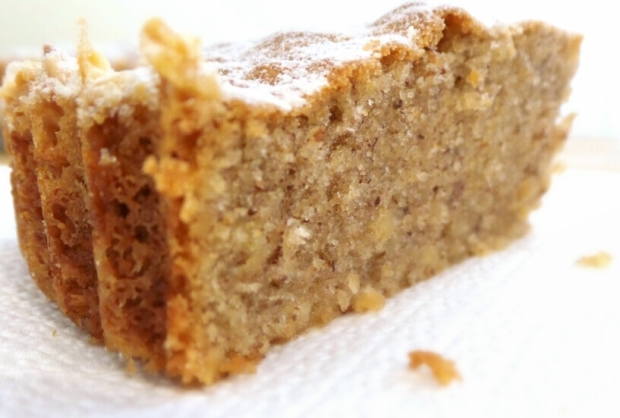
“Toasted Almond and Pecan Frangipani”

1447156405544

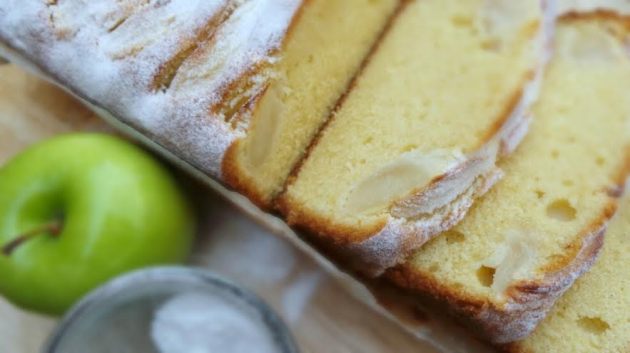
Some of my best ever recipes might be considered fuss free but never lack all the delightful qualities of a great home bake.

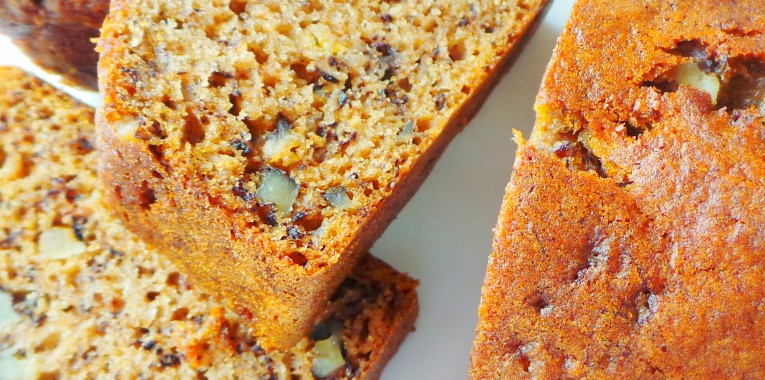
With a crumb thats both moist and has a heavenly aromatic warmth that only roasted nuts can give. A crunchy crust which can only be described as….”Balance has been restored in the universe of baking”. If you are partial to pecans and almonds as I am, then Im thinking you will love this recipe.

Crunchy crust coating:

1 x 20cm round baking pan

10g room temperature unsalted butter                                                                                                                  40g flaked almonds                                                                                                                                                        2 Tablespoons caster sugar

Spread the butter all over the base and sides of the baking pan.

Spread the almonds and sugar around the edges and base and set aside.

1447155491139

For the Frangipani:                                 

75 g whole Almonds toasted                                                                                                                                       75 g whole Pecans toasted
140 g Caster sugar (optional use French Caster Sugar – CSR Sugars of the World)
3 eggs
115 g butter at room temperature
50 g Plain/All purpose flour                                                                                                                                         1 pinch of salt
1/4 teaspoon baking powder

Topping:                                                                                                                                                                      40g Flaked Almonds

Preheat oven to 170 ° C (fan forced).

In the bowl of your food processor fitted with the cutting blade place the toasted almonds, pecans and sugar pulse till the nuts are and even crumble.

Add eggs and butter and the pinch of salt pulse the food processor for 30 seconds.

Finally add the flour mixed and baking powder, pulse again till everything is well combined.

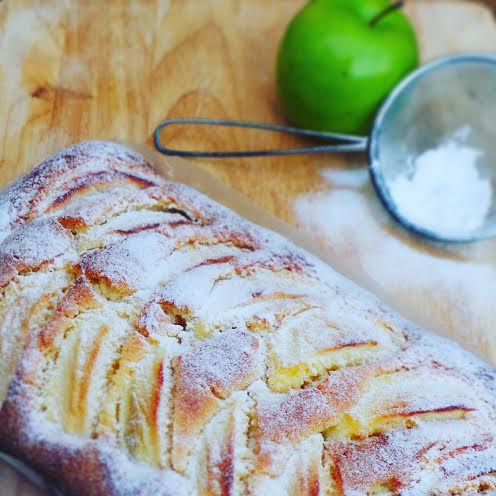
Pour the cake batter into the cake pan and sprinkle the 40g of flaked almonds evenly over the top of the batter. Bake for 30-35 minutes, till the cake is golden.

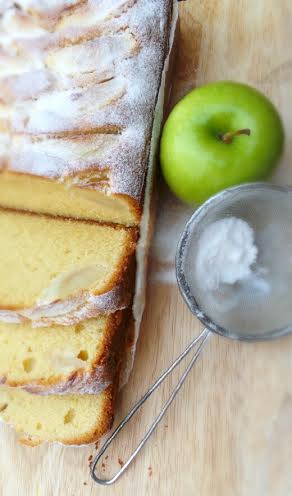
Let the cake cool completely before removing from the cake pan.

Dust with a little icing sugar and serve. 🙂

IMG_20151110_222447

1447155712668


French Sugar – Apple and Almond Loaf


French Sugar – Apple and Almond Loaf

FAAC4

Ingredients:

190g soft butter

130 g French Caster sugar (White Beet Sugar – CSR Sugars of the World)
3 eggs
190 g Plain flour
1/2 Tablespoon baking powder
60g ground almonds
30g Sour Cream
1 teaspoon vanilla bean Paste

1 Large Granny Smith apple pealed with core removed and cut into 8 wedges.

Method: 

Preheat oven to 190 ° C.

Firstly peal and core the apple, cut into wedges squeeze some fresh lemon juice over the apple pieces and sprinkle with a little sugar. Place the coated apple pieces in a bowl and set aside for the moment.

Using a standard mixer with the paddle attachment, cream together butter and sugar till fluffy and pale in colour then begin adding the eggs one by one. Be sure that they are well combined before adding the next egg.

Add the sour cream and vanilla bean paste.

Sift together the flour, ground almonds and baking powder. Add to the butter and egg batter. Mix till all ingredients are well combined.

Place cake batter in cake tin lined with baking paper, place apple slices along the top of the cake batter and sprinkle with French caster sugar.

Bake for 10 minutes then lower the thermostat to 170 ° C for 25-30 minutes. Or until a wooden skewer can pierce through the centre of the cake and is clear of any wet batter when removed.

Allow the cake to cool in the cake tin then remove and allow to cool completely on a cooling rack.

Sprinkle the cake with icing sugar and serve.

FAAC5

FAAC7

 FAAC1


Golden Gaytime Cake – Layered and Perfectly Naked

Recipe makes 1 (6 inch) layered Naked Cake

Serves 8 – 12

Equipment

1 (7 inch) Cake Board

1 (6inch) Cake Ring

1 Strip of Acetate approximately 40cm length and approximately 13 – 14cm wide

Assemble Cake Instructions

  1. Place a piece of baking paper on your work bench, invert the cake onto it and remove the parchment from the cake.
  2. Use the cake ring to cut out 2 complete cake circles which will be the top two layers of your cake and the remaining cake should be enough to cut two circle halves and scraps to fill in any gaps for 1 bottom layer.
  3. On a baking tray place the cake base, clean the cake ring and place this in the centre of the cake board. Line the inside of the cake ring with the acetate. Now we are almost ready.
  4. Place the two halves and any cake scraps you require to fill the first layer (base) to make a flat even layer.
  5. Warm the Cho-Malt Fudge Sauce spread, one fifth of the Choc-Malt Sauce over the base. (The sauce is so much easier to spread when its warmed)
  6. Spread half the quantity of Caramel Creme then sprinkle with the (small particle) Malt Crumble gently push them into the Caramel Creme to fix them in place.
  7. Spread another layer of Choc-Malt Fudge Sauce. Repeat the process for the next cake layer.
  8. Place the last layer on top spread the last amount of Choc-Malt Fudge Sauce and cover with the Chocolate Butter Cream. Garnish the top with the remaining large Malt Crumble Biscuit pieces.
  9. Place the cake in the fridge and allow to set for a minimum of 12 hours.
  10. Use a hot knife to slice and serve.


GGC9


Vanilla Bean Cake

makes 1 (12 by 12 inch) square cake

55g Unsalted Butter (room temperature)

210g Caster Sugar

60g Rice Bran Oil

2 Eggs

1 Egg yolk

1 tsp vanilla Bean Paste

110g Buttermilk

185g Plain Flour

1 tsp baking Powder

1/2 tsp Salt

  1. Pre-Heat the oven to 170 Degrees Celsius
  2. Sift the flour, baking powder and salt and set aside.
  3. Cream the butter and sugar together then add the rice bran oil, vanilla bean paste and eggs one at a time. Add the extra egg yolk. Cream till pale and fluffy.
  4. Alternate the addition of the flour and the buttermilk till both have been combined.
  5. Pour into a square baking tin lined with baking paper spread out the batter evenly and bake for approximately 20 – 25 minutes.
  6. Allow to cool completely.

Caramel Creme

280g Milk

75g Cream

100g Caramel

1tsp Vanilla Bean

25g Cornflour

50g Caster Sugar

2g Salt

3 Egg Yolks

2tsp Maple Extract

4g Gelatin (2 Sheets) or  (2 teaspoons Gelatin Powder – Bloomed)

————————————————————————–

40g Cold Butter

————————————————————————–

160g Cream

  1. Pour the milk, cream and caramel into a sauce pan and bring to a boil.
  2. Combine the cornflour, sugar, salt and mix. Add the egg yolks and whisk till the sugar has dissolved.
  3. While whisking pour the boiling milk over the egg yolk mixture a little at a time till the egg mix is tempered.
  4. Pour the entire mix back into the pot and whisk continuously till the custard creme thickens and has reached a boil. Remove from heat and add the maple extract and the cold butter. Whisk continuously till the butter has combined and the Caramel Creme is smooth.  If the custard has any lumps pass it through a strainer.
  5. Pour into a heat proof bowl cover the caramel custard with plastic wrap, press the cling film directly onto the custard to stop a skin from forming while it cools completely.
  6. Once the caramel creme is cold. Whip the fresh cream to soft peak. Place the caramel creme into the bowl of a standard mixer and re-whip till smooth. Fold the soft whip cream into the caramel creme.

Malt Crumble Biscuit

30g Low Fat Milk Powder

40g Flour

12g Cornflour

40g Malt Powder

25g Caster Sugar

2g Salt

55g Butter (Melted)

————————————————————————–

60g Malt Powder

90g White Chocolate (Melted)

  1. pre-Heat the oven to 170 Degrees Celsius
  2. Place the powdered milk, flour, cornflour, malt powder, sugar and salt into the bowl of a standard mixer with the paddle attachment. Mix all till well combined then add the butter mix till a fine crumble is formed. Pour the crumble onto a baking sheet lined with baking paper and bake for 20 minutes. The crumble should be golden and the buttery aroma should have filled the room.
  3. Allow the crumble to cool completely. Sprinkle the malt powder over the crumble and break up any large pieces of biscuit.
  4. Melt the white chocolate and pour over the crumble, using your fingers enrobe the crumble with the white chocolate. You will notice some large crumble pieces and small pieces have formed. Allow the crumble to cool and set aside about half a cup full of the larger crumble pieces aside for garnish and the rest for between the cake layers (make sure these are all about the size of rice grains).

Chocolate Buttercream

115g Unsalted Butter (room temperature)

80g Icing Sugar

1g Salt

2Tbs Cocoa Powder

————————————————————————–

55g Milk (Cold)

  1. Using a standard mixer with the paddle attachment cream the butter till pale in colour then add the icing sugar, salt,and cocoa powder.
  2. Cream until the buttercream is light, smooth and fluffy while whipping add the cold milk. (Don’t forget to scrape down the sides).

Milk Chocolate Malt Sauce

60g Milk Chocolate

80g Malt Powder

1g Salt

—————————————————————————-

200g Glucose

50g Caster Sugar

150g Cream

  1. Combine the milk chocolate, malt powder and salt in a heat proof bowl and set aside.
  2. In a saucepan combine the glucose, sugar and cream, bring to the boil remove from heat and pour over the milk chocolate and malt mix.
  3. After a few minutes slowly whisk the chocolate malt sauce until the mixture is smooth and silky. Pour the sauce in a food processor and blend till the sauce is completely smooth.

——————————————————————————–

IMG_20151024_184241


Coconut Blossom Caramel Sauce


CSR SUGAR Australia has released a beautiful range of traditionally farmed sugars. Each one with its deep rich and delicate notes of caramel, butterscotch, toffee and treacle. The unique molasses content in each gives the unrefined sugar its golden colour and decadent flavour.

So I thought I’d put it to the test!

I adore this recipe it can be use in cakes and buttercreams or warmed and drizzled over ice cream, puddings or eaten straight up with your favourite spoon or simply smear over toast.

IMG_20151027_104225

Be creative Ive made this recipe with all of the different sugars and each time its been a delicious result. So make a caramel sauce to suit your personality and your taste buds.

France – French Caster Sugar

Colombia – Panela Sugar

Sri Lanka – Rapadura Sugar

Indonesia – Coconut Blossom Sugar

Australia – Muscovado Sugar

IMG_20151027_103919

COCONUT BLOSSOM CARAMEL SAUCE

Makes about 1  1/2 cups

UTENSILS

1 x 2 Liter Heavy base saucepan

1 Candy Thermometer

1 Whisk

1 Heatproof jar with lid to store your caramel

INGREDIENTS

125g Cream

60g  French Caster Sugar

60g Coconut Blossom Sugar

60g Unsalted Butter

45g Glucose

1/4 tsp Salt

——————————–

1/2 tsp Vanilla Bean Paste

125g Cream

METHOD

Bring the 125g Cream, sugar, butter, glucose and salt into the heavy base saucepan uncovered over medium to high heat. Once the sugar has dissolved  whisk the mixture just a few times to combine and continue to boil till the mixture reaches 120 Degrees Celsius take off heat.

Add the vanilla and cream in a thin stream while whisking constantly till well combined. Place back on the heat and boil again. Remove from heat straight away. Allow to cool for a moment.

Pour the caramel into a heat proof container.

Leave to cool then cover it tightly and store in refrigerator.

Re-heat to use.

Don’t forget this caramel sauce makes a great gift too!

Enjoy 🙂

My Best Ever “Banana and Walnut Cake”

20150610_105223~2

20150610_102931~2

20150610_104312~2

Banana and Walnut Cake

85g butter (room temperature)

150g Sri Lankan Rapadura Sugar

———————————

1 egg

———————————

200g ripe bananas, mashed (approximately 2 ripe bananas)

———————————

125g natural Greek yoghurt

30ml rice bran oil

———————————

220g flour

3/4 teaspoon baking powder

1/2 teaspoon bicarbonate powder

1/4 teaspoon salt

———————————

60g walnuts, chopped

1: Preheat oven to 180°C, or if it’s fan-forced, 170°C.

2: Prepare a loaf pan by lining it with baking paper. Set aside for the moment.

3: Combine the butter and sugar in a stand mixer fitted with the paddle attachment. Beat for 3 to 4 minutes then add the egg. Don’t forget to scrap down the sides.

4: Mix together the mashed banana, yoghurt and oil. With the mixer on low speed, add to the batter. Beat for a further 4 to 6 minutes or until the batter is light and fluffy.

5: Still on low speed, add the dry ingredients to the batter and then the chopped walnuts. Pour the batter into the loaf pan. Give the bottom of the pan a tap to even out the batter and release any large air bubbles. Bake on the middle shelf of the oven for 25 to 35 minutes or until a skewer inserted in the middle comes out clean.

6: Leave on a cooling rack for 5 to 10 minutes before removing from the pan.

Make like Maria and try these sugars in your favourite recipes. Discover the new Sugars of the World range in Coles, Woolworths and Independent retailers nationally. www.sugarsoftheworld.com

Enjoy!

20150610_105924~2

20150610_104312~2

Salted Caramel TWIX Cake…for the busy baker.

20141001_160942~220141001_160932~2


“Salted Caramel TWIX Cake” ……..this is for the busy baker!

Equipment you will need 1 x Loaf tin approximately 26cm x 8cm x 6cm.
Cooling rack
Baking tray
Plastic food wrap
Hair Dryer

10556233_359694737517599_5242970478030278216_n

Ingredients

1 x Vanilla / Butter Cake

Pre heat the oven to 180 Degrees.

Prepare your tin by greasing with cooking oil spray. Line the tin with baking paper.

Prepare the cake mix as directed and bake as recommended or till golden and baked through.

Chocolate Shortbread

For the Chocolate Short bread (This will be the biscuit base of the cake)

300g 00 Flour
30g Cacao Powder
130g Icing Sugar
150g Unsalted Butter
3 Egg Yolks

Place the Flour, Cacao, Icing Sugar, and cold unsalted butter in the bowl of a food processor and pulse till all the ingredients have combined. Add the egg yolks and pulse again till it all comes together, push the dough together (careful not to over work the dough). Make a ball flatten it slightly and wrap the dough with plastic wrap, rest in the fridge for 15- 30 minutes.

On a lightly floured surface roll out the dough to 5 millimetre thickness cut a rectangle the size of the widest part of your loaf tin pierce holes over the dough with a fork. Bake in a preheated oven at 180 Degrees for 12 minutes. Remove from the oven and allow to cool completely on the baking tray.

Caramel
1 x 300g Salted Caramel Dessert Sauce ( the brand I used is Safeway Gold Salted Caramel Dessert Sauce)
50g Milk Chocolate Melts

Place the salted caramel dessert sauce in a saucepan and heat through while constantly stirring.

Remove form heat as soon as it comes to the boil. Add the milk chocolate stir all till well combined till you have a smooth glossy caramel. Set aside to cool slightly.

To prepare the mould / channel (to form the dome shape which will be the top of the cake) for the caramel use the same loaf tin. Place cling wrap over the top of the loaf tin and allow it to evenly sink down creating a channel. Secure all four sides of the plastic to the loaf tin and pour the semi cooled caramel into the channel then set aside.

Chocolate Ganache

450g Milk Chocolate Melts
220g Cream

14g Glucose
60g Unsalted Butter

Place the chocolate in a heat proof bowl.

Bring the cream, butter and glucose to the boil and pour it over the milk chocolate pieces.

After 5 minutes use a whisk to stir the chocolate and cream together till it is smooth and glossy.

10448198_359694787517594_4875242217414039070_n

Assemble the cake

Smear a layer of caramel on to the biscuit base.

Trim your cooled butter cake so that the top of the cake will now sit flat on the rectangle biscuit base.

Place the narrow side of the butter cake on to the caramel. Cover with plastic. Place the cake into the freezer for about 30 – 45 minutes.

Remove the cake from the freezer and carefully flip it over on to a cooling rack, the caramel will set frozen, peal the plastic off leaving the cake with a caramel dome on top.

Place a baking tray under the cooling rack and pour over the chocolate ganache. The cooling rack will allow the excess ganache to drip through leaving a smooth coating.
Technical Trick

To get the cake looking like a TWIX Bar use your hair dryer on a cool setting to blow air over the top of the ganache this will create the rippled effect.

Chop some TWIX bars and use them for decoration on top.


Sugar and Spice Gingerbread

Food from Home blog!

To say that there is a special place in my heart for gingerbread would be an understatement. While baking my house is filled with the sweet spicy aromas of ginger, cinnamon and clove. I think its a warmth that touches your heart and soothes the soul that feeling of comfort and security….who would of thought that a humble biscuit was this and so much more. Christmas must be around the corner but when I really think about it there’s no need to wait gingerbread is lovely any time of the year.

Ginger Bread House and Template

  Gingerbread Dough:

100g butter chopped

1 cup Brown Sugar (Firmly packed)

1/2 cup Molasses

1/2 cup Golden Syrup

1 egg (lightly whisked)

4.5 – 5 cup Plain Flour (extra for dusting)

1 Tablespoons Ground Ginger

1 Tablespoons Cinnamon

1 Tablespoons Ground Cloves

1 teaspoon Bicarbonate of Soda

Royal Icing:

1 x Queen…

View original post 306 more words

Red Cake Day – Haemophilia Awareness Week

There are moments when you are presented with an opportunity to be involved in an event that has a wonderful purpose. The Haemophilia Foundation Australia has honoured me with the opportunity to design and make a cake to launch

“Haemophilia  Awareness Week”

Red Cake Day

BWfwpkUCcAACuwa.jpg-medium

998418_601306269909180_1330175045_n

After drawing countless designs I finally settled on the one I thought would best represent the theme of the event. This has been the largest cake I have ever attempted but I was looking forward to the challenge with great anticipation.

There is something special about working with RTR or ready to roll fondant its the moulding clay of the cake world. With my design in hand it was time to start the construction. A 5 tiered double barrel tower.

20131012_170854

After approximately 35 hours countless flower petals, pipping and stencilling the “Red Cake Day” cake was finished.

20131013_192856

I would like to take the opportunity to sincerely thank this wonderful team.

20131014_083313

Haemophilia is a lifelong challenge which can be disabling and life-threatening without treatment. Your support during Haemophilia Awarness Week and Red Cake Day will help young Australians affected by haemophilia. To lend a hand please visit: http://www.haemophilia.org.au/redcakeday

What’s on at the “Royal Melbourne Show”

20130910_190312Come and say a big baking “Hello” Sunday 22 September at the The “Royal Melbourne Show” Channel 9 site in the Woolwoths Fresh Food Pavilion. I will be there looking forward to meeting you all #RoyalMelbourneShow #Channel9#BakeOffAU #GrandPavilion Channel 9 The Great Australian Bake Off

Sunday September 22nd from 1.00pm – 2.00pm
Friday September 27th from 12.00pm – 1.00pm

Im also doing a Baking Demo at the Tastes of Victoria Pavilion Friday September the 27th at 2.30pm.

“Heavenly Snickers Swiss Roll”

Easy ways to present and impress your guests.

Heavenly Snickers Cake – Made Easy!

“Where love has no boundaries”

20130916_113556

For those who adore chocolate, love the smooth silky taste of caramel and the salty crunch of peanut butter this gorgeous cake will have you giddy with excitement. Willy Wonka would be both delighted and shocked to see that a beloved confectionary bar can be transformed into a feast for the eyes and a playground for the taste buds.

Lets not talk about the hips – moderation is always the key!

While flicking through the pages of favourite magazines I came across a few recipes  by Heston Blumenthal and his version of a Giant Snickers Cake tempted as I was at the time I thought I would set my own challenge and try to recreate or deconstruct this recipe. This version is for the “Home Baker” an easy and quick version that I think everyone should bake and enjoy with the whole family, neighbours, friends or workmates…..It’s a Show Stopper!

20130916_113605

You will need:

2 x 7 inch cake tins greased and lined with baking paper

1 Packet of White Wings Chocolate Heaven Cake

Snickers Filling

250g Cream Cheese

1 cup Caramel (Store bought is ok to use)

1/2 cup Crunchy Peanut Butter

Chocolate Ganache

225 g Milk Chocolate (for melting and cooking) roughly chopped

115 g Cream

1 Tablespoon Unsalted Butter

1 Tablespoon Honey

Method:

1: Make the chocolate cake as per directions on the packet, divide the batter between the two cake tins and bake as directed.

2: To make the filling place the cream cheese in the bowl of a standard mixer or use a hang held mixer to cream the cheese to a smooth paste with no visible lumps. Add the caramel and blend well to combine remember to scrap down the sides of the bowl so that all the cream cheese has been incorporated. Add the peanut butter and mix well. Set aside.

3: To make the chocolate ganache place the chocolate in a heat proof bowl. Place the cream, butter and honey in a small pot and bring them to a gentle simmer pour over the chocolate and mix till smooth and glossy.

4: Once the cake has cooled evenly trim the tops off to form and even surface. Slice each cake in half. Divide the filling into three portions and use one portion per layer. Check that your cake is stacked straight. Allow to set in the fridge for 30 minutes.

*Note: Make sure you use the bottom layer of one of the cakes as the very top, in other words you will need to flip it this will allow you to have a lovely smooth and straight surface to work with.

5: Pour a little ganache over the top of the cake and allow it to roll over the side. With the remainder of the ganache – smear it around the edge of the cake filling in and gaps (if the ganache is too runny wait a little for it to cool further and thicken).

* Note: I have finely chopper up some more chocolate and loosely decorated the sides.

6: For a finishing touch pipe little dots of caramel around the edge of the top of the cake.

This really is a cake with decadent proportions, but I have always found that the best way to enjoy it is by sharing a few delicious calories with friends.

When I made this cake originally it was a Swiss Roll and I made everything from scratch even the caramel. I think this is a lovely quick and easy way to achieve almost the same gorgeous results.

Enjoy 🙂

20130916_150109

20130916_150216

20130916_150317