Walnut Soda Bread

I have one recipe and about 100 variations of a classic soda bread. The original recipe was in a very old cookbook (in ounces and measurements which make me think it was all estimated)  I found it in an opportunity shop in Bendigo, country Victoria, Australia ….…(A little travel information for my non Aussie friends). Now Im going to pay it forward. This is my version of a Walnut Soda Bread and it sounds fancy but its oh so easy.


Soda Bread 2

20170314_191740

Every time I make a soda bread I find my faithful recipe and depending on whats cooking the recipe will be adjusted to compliment the main meal. *Pairing flavours to suit the meal, herbs, walnuts, olives, parmesan or pine nuts these are a few ideas.

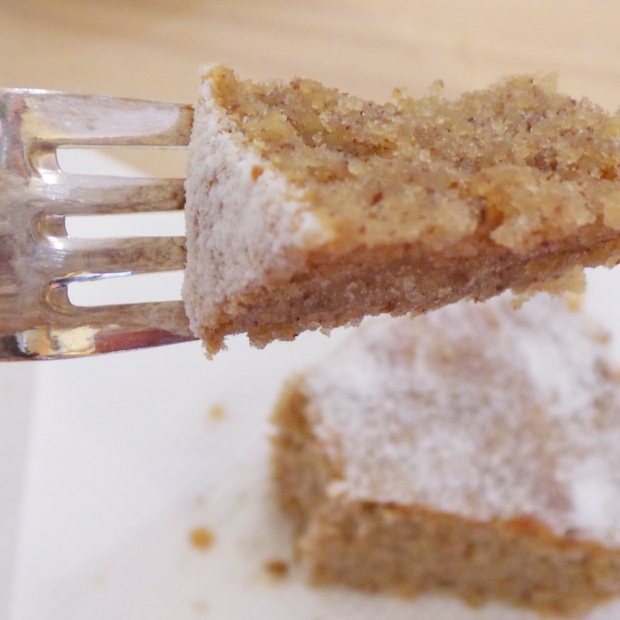
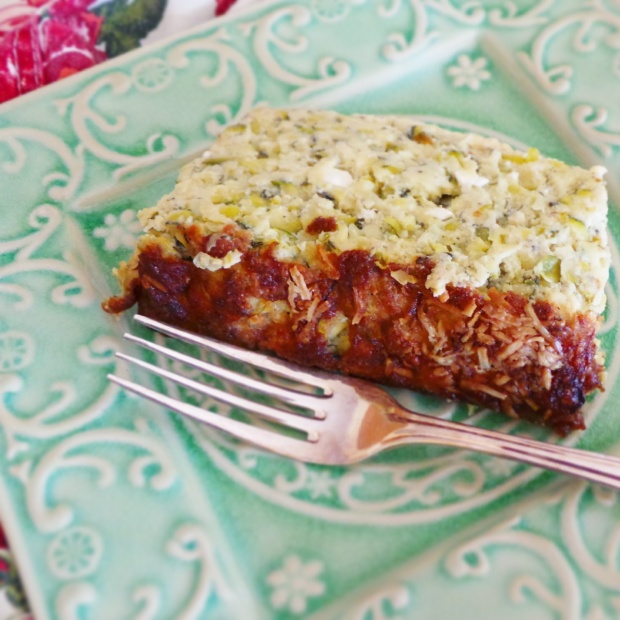
Today its just simply adding crumbled walnuts as Im going to be serving it with my Greek lentil soup. The addition of walnut will add texture and flavour to the overall meal.

Flour, buttermilk, salt, sugar, walnuts and bicarbonate of soda. The oven is always preheated and after a little very light kneading, shaping and a dusting of flour and four purposeful cuts to the dough ball its into the oven…..now I hope I didn’t make that sound too complicated.

Remember this is more like a scone than a traditional bread….so keep the kneading to a bear minimum. The technique to making a great soda bread is to minimise the formation of long gluten strands so KEEP IT SHORT 🙂

20170314_191632

“Walnut Soda Bread”

Ingredients

500g Plain White Flour or Bakers Flour

1 teaspoon Salt

1 teaspoon Caster Sugar

2 teaspoons Bicarbonate of Soda

60g Walnuts (roughly chopped)

420ml – 450ml Buttermilk

extra flour for dusting

Method

Preheat your oven to 190 Degrees Celsius

  1. In a bowl add all the dry ingredients and mix well.
  2. Add the buttermilk without too much force or kneading bring the dough together into a ball
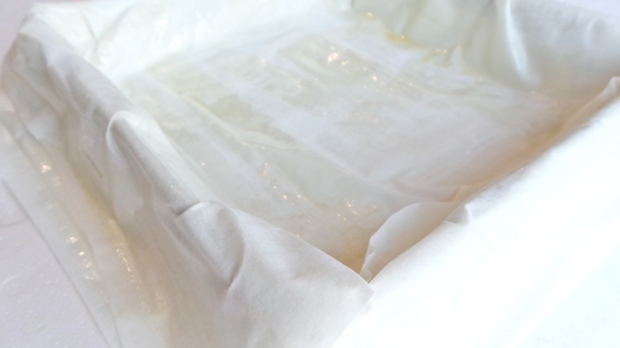
  3. Place the dough ball onto a tray lined with baking paper or alternatively you can dust the base of the baking tray with more flour and place the dough directly on top
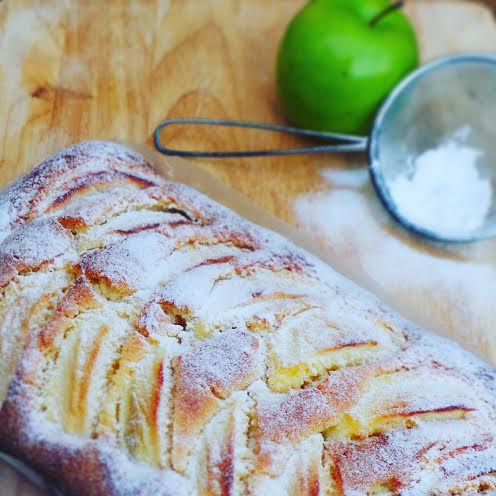
  4. Dust the top of the dough with flour and cut a cross through the top straight down to the bottom creating four quarters.
  5. Place into the oven for approximately 35 – 45 minutes.

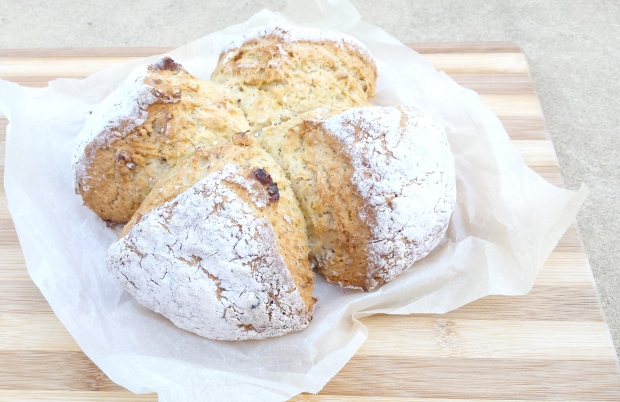
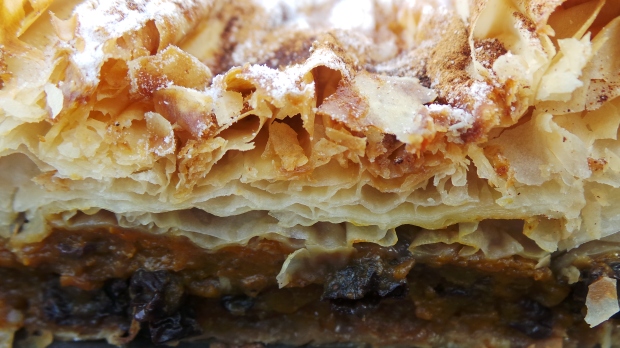
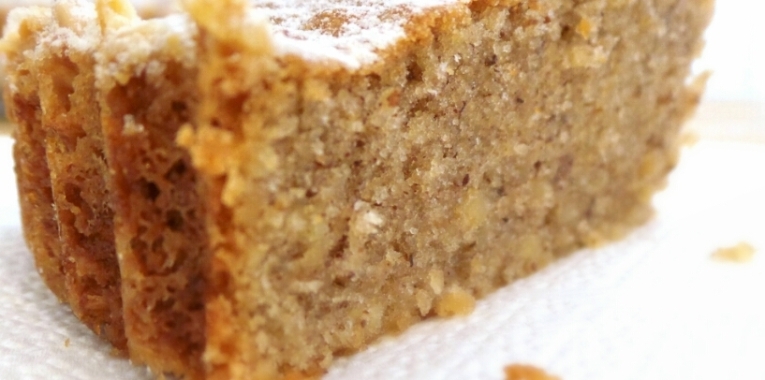
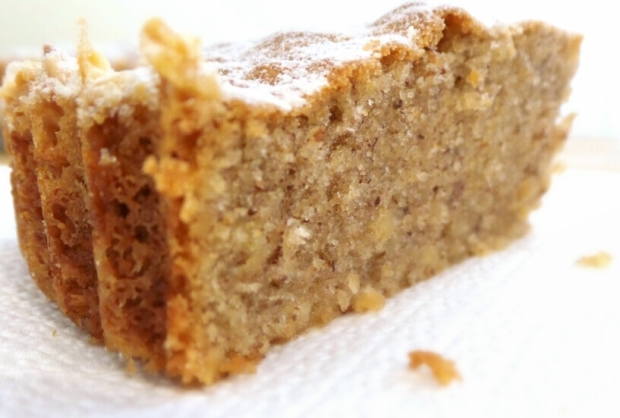
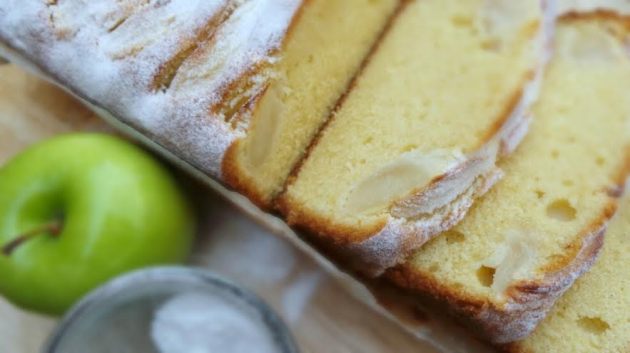
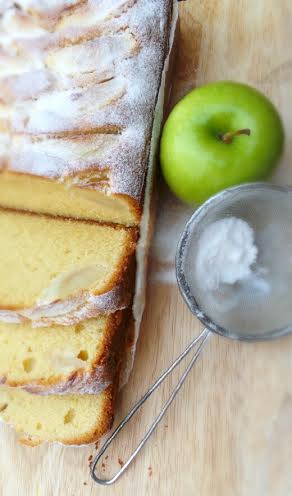
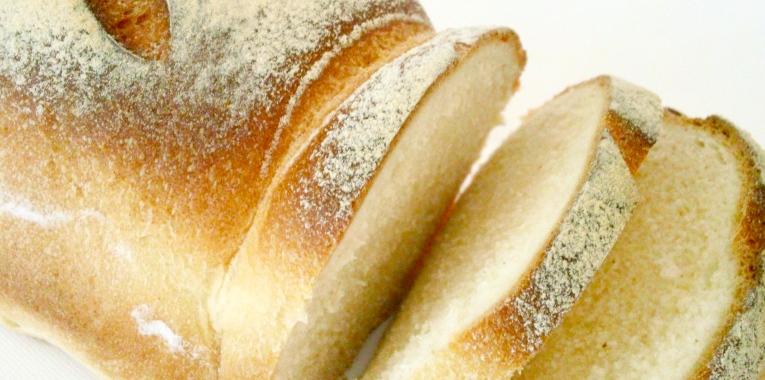
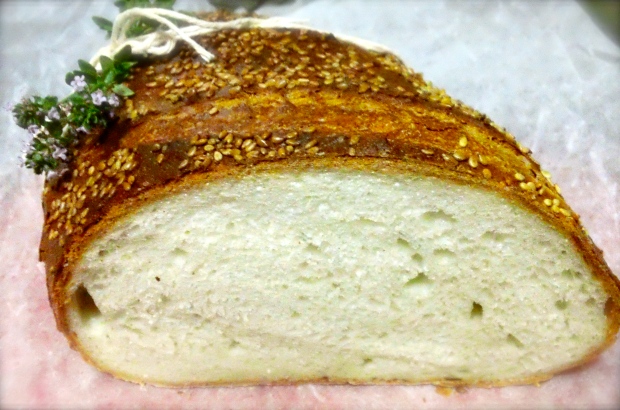
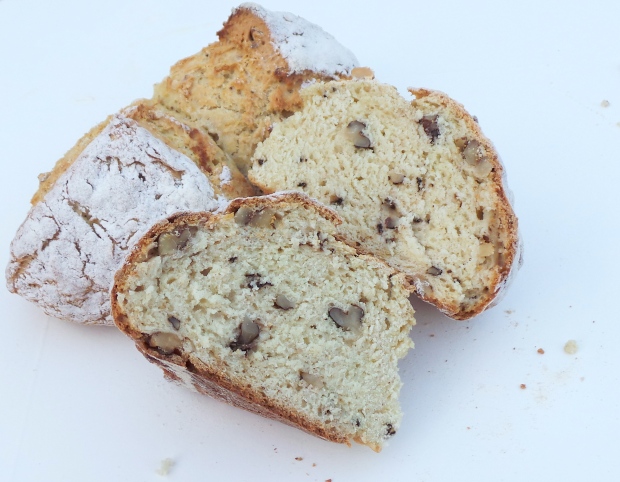
As the Soda Bread bakes it will rise and expand. You want it to have a lovely golden crust on the outside.

Once baked cool the soda bread on a cooling rack.

*Just a note as you can see from the pictures the extra flour you added over the dough ball before you baked it will NOT necessarily turn golden so look for the baked signs on the expanded surface of the soda bread.

20170314_191714

20170314_191157

Soda bread 3.jpg


Gingerbread Angels

Christmas just isn’t the same if I don’t bake gingerbread Angels, Deer or Gingerbread Men!

…. well if Im honest there will always be something baking.

img_20151216_210506

I love this spicy biscuit especially when just baked. Who needs exotic air fresheners when all you need to do is a little baking. The warm aromas of Ginger, Cinnamon, Nutmeg and All Spice will have you reaching for the kettle and sitting down with your favourite brew in one hand and a Gingerbread Angel in the other.

I’ve been asked a few times and its worth noting that to build a gingerbread house the dough is a little different slightly dry and once baked not as soft and fluffy as the gingerbread men you might be familiar with. My recipe can be used for both individual biscuits like these angels or if you want to make a gingerbread house. After baked the biscuit is crisp but after a few days they begin to soften slightly.

To decorate the angels or other shapes I like to use Royal Icing and a few soft shell sugar pearls and sprinkles to add a little glam like the red and green and red garland wreath or the gold sugar crystal hearts its really up to you. In the past Ive also used 100’s and 1000’s and they look great too. I hate to admit this but its all up-to the Christmas Tree and the overall household decorations  that dictate that years colour theme…..That’s a bit over the top but then again thats me!

img_20151216_191902

You will need:

Rolling Pin

Baking trays

Baking Paper

Cookie Cutter (Angel, Reindeer, Santa) Ive used Angel

Ingredients:

100g Unsalted Butter

200g Soft Brown Sugar

150g Molasses

150g Golden Syrup

1 Egg

700g Plain Flour

1 teaspoon Baking Powder

1 teaspoon Ginger powder

1 Tablespoon Cinnamon Powder

1 Tablespoon Mixed Spice

1 teaspoon Bicarbonate of Soda

1 teaspoon White Vingar

A little extra flour for dusting your work surface

Method:

  • Bring the butter, Molasses and Golden Syrup to a gentle simmer mix well, remove from heat, allow to cool.
  • Sieve the flour, baking powder, Mixed spices, Cinnamon and Ginger together and set aside
  • Add the egg to the cooled butter syrup and mix well
  • Mix together the Bicarbonate of Soda and Vinegar, mix into the butter syrup
  • Add the butter syrup to the flour, fold through to make the dough
  • Wrap the dough and rest in the fridge before rolling out for baking.
  • Pre Heat oven to 180 Degrees and bake biscuits for approximately 12 minutes

Remove the dough from the fridge. Very lightly sprinkle some flour on your work bench. Roll out the dough to about 3-4mm thick. I like to dip the cutting edge of the cookie cutter into the flour shake off the excess and then cut the shape (repeat till you have cut out all) Gently lift the dough shapes onto the prepared baking trays. Leave a good 1-2cm between each shape.

Bake the gingerbread for about 12 minutes (you know your oven, sometimes they run hotter than others so watch the first batch and adjust your time accordingly). Allow the baked gingerbreads to cool slightly on the baking tray before you move them to a cooling rack to cool completely before decorating.

To decorate your Gingerbread you will need some

Royal Icing

Small Pipping Bag

Sprinkles – Ive used Queens White Soft Shell Pearls (which are great ….No more chipped teeth using the other hard ones “Great Ideas Queens”

Mixed Red and Green Sprinkles for the Garland Wreath

Black or Brown Food Colour Pen to draw on the face (which can only be done after the royal icing has completely dried……don’t be tempted to do it any sooner, trust me! )

Step 1

Fill the piping bag with royal icing (2-3 Tablespoon full) cut the tip of the piping bag so that you can pipe a line. If the royal icing is too runny thicken it up with a little more icing sugar or if too thick add a tiny amount of water (a little goes a long way)

Step2

Trace the shape of the angel all the way round, allow this to dry as you finish the other baked gingerbread.

Step 3

Once the outer edge is dry, time to fill it in. This time you want the royal icing to have a little movement so that it will spread easy but not run away ….if you know what I mean 🙂 Using the same piping fill it with the royal icing again and slowly fill in.

Step 4

Once again wait till the royal icing is dry before you continue with this step. To make the Garland wreath pipe a ring of royal icing onto the angel and sprinkle with the sprinkles. Allow it to set and then shake off the excess. For the hallow pipe a line of royal icing and then gently place the soft shell pearls across and allow to set dry.

Now the rest is up to you! I like to put the angels in clear food / lolly bags tie some colourful ribbon over the top and give them as gifts. Ive used them as name cards for Christmas lunch. Ive even used them as ornaments on the christmas tree. What ever you choose to do Im sure they will be enjoyed by all.


img_20151216_210634

img_20151216_191714


Lucy's Friendly Foods

There’s not a great deal to say about these other than they’re part brownie, part cookie… they’re chocolate brownie cookies! So they have that soft chocolate texture in cookie form, and they taste just like brownies. Best of both worlds, right? They got a thumbs up here anyway.

Chocolate Brownie Cookies (dairy-free, egg-free, nut-free, soya-free, sesame-free, vegetarian and vegan)

IMG_6275

makes 10-12

  • 1/2 cup plus 2 tbsps plain flour
  • 1/4 cup cocoa powder
  • 1/4 tsp baking powder
  • 1/2 tsp bicarbonate of soda
  • 1/3 cup sugar
  • 1/4 tsp salt
  • 1/4 cup sunflower oil
  • 1 tsp vanilla extract
  • 3 tbsps oat milk
  • 1/2 cup chocolate chips

– Preheat the oven to gas mark 3

– Line a cookie sheet with parchment

– Sift together the flour, cocoa, baking powder and soda. Stir in the sugar and salt.

– Pour in the oil, vanilla and oat milk.

– Bring together to a dough.

–…

View original post 61 more words

“Kolokithopita”….Greek Ruffle Sweet Pumpkin Pie

13233119_10153654524032709_2693906261553550733_n

Now I know there aren’t that many ingredients and well the method seams relatively simple but trust me this is BIG on flavour.

This is my favourite childhood dessert. My mother was taught by my grandmother and I make it for my friends and family too. I love pumpkin and I’ve made this pie for friends that have never enjoyed eating this glorious orange coloured vegetable as a savoury addition to a meal  let alone as a dessert…….and “they have loved it”. The aroma of it baking in the oven, the butter caramelising the fillo pastry and the smell of the sweet spiced pumpkin makes for one heavenly combination.

20160621_123358

20160621_132929

20160621_142440

20160621_143121

20160621_143338

20160621_143752

20160621_144202

Utensils:
1 large bowl
1 Vegetable grater
1 Deep baking pan 25cm x 25cm x 5cm (a little bigger is ok)
1 pastry brush

Ingredients:
600g Pumpkin (peel and seed discarded the pumpkin flesh grated)
80g Sugar (I like to use Coconut Sugar)
80g Currants
1/2 Tbs Cinnamon powder
1/4 tsp Clove powder
1/2 Orange Zest only (optional)
1/2 tsp Salt
1pkt Fillo pastry
100g Unsalted butter melted (cooled to room temperature)
30g  Rice Bran oil

Method:
1: Grate the pumpkin and place in a deep bowl

2: Add the sugar, currants, spices, salt and orange zest mix well cover the bowl with cling film and set aside for approximately 30 minutes.

When you are ready to assemble preheat the oven 170 Degrees(fan forced)

3: Butter the deep baking pan. Lay flat 1 sheet of fillo pastry and brush 
with butter line the inside of the baking dish then repeat with the next 
filo pastry sheet till you have 4 pastry sheets lining the base and edges. 

*You will need to be a little creative when you lay out the sheets making  sure to cover the edges and leave any excess hang over the lip of your 
baking dish as you will flip it over when you have added the filling.

4: Pour the pumpkin filling in spread evenly. Fold over any over hanging 
pastry. Butter 2 more sheets of pastry and lay them over the top of the filling - make sure to fold over and execs pastry this time so that all the 
top layer is nice and flat.

5: Butter 2 more sheets this time you will need to cut them to size so thatthey fit perfectly. Make fillo ruffles by gently making folds and gently 
scrunching then together and placing on top. Repeat the till the top is 
completely covered. You will need about 7 sheets or more. 

6: Bake for approximately 35 - 45 minutes or till the pastry is golden 
brown. 

Ive always served this dessert at room temperature dusted with icing sugar or you could try agave powder and just a little more cinnamon powder. if you would like to serve it hot then a nice scoop of vanilla ice-cream is     perfect.
20160512_095816

I hope you all enjoy my very own child hood favourite. 

20160512_095421

Note: 
tps = teaspoon
TBS = Tablespoon


Toasted Almond and Pecan Frangipani

A Dainty Dessert without the fuss…..”Sounds like my type of recipe”

“Toasted Almond and Pecan Frangipani”

1447156405544

Some of my best ever recipes might be considered fuss free but never lack all the delightful qualities of a great home bake.

With a crumb thats both moist and has a heavenly aromatic warmth that only roasted nuts can give. A crunchy crust which can only be described as….”Balance has been restored in the universe of baking”. If you are partial to pecans and almonds as I am, then Im thinking you will love this recipe.

Crunchy crust coating:

1 x 20cm round baking pan

10g room temperature unsalted butter                                                                                                                  40g flaked almonds                                                                                                                                                        2 Tablespoons caster sugar

Spread the butter all over the base and sides of the baking pan.

Spread the almonds and sugar around the edges and base and set aside.

1447155491139

For the Frangipani:                                 

75 g whole Almonds toasted                                                                                                                                       75 g whole Pecans toasted
140 g Caster sugar (optional use French Caster Sugar – CSR Sugars of the World)
3 eggs
115 g butter at room temperature
50 g Plain/All purpose flour                                                                                                                                         1 pinch of salt
1/4 teaspoon baking powder

Topping:                                                                                                                                                                      40g Flaked Almonds

Preheat oven to 170 ° C (fan forced).

In the bowl of your food processor fitted with the cutting blade place the toasted almonds, pecans and sugar pulse till the nuts are and even crumble.

Add eggs and butter and the pinch of salt pulse the food processor for 30 seconds.

Finally add the flour mixed and baking powder, pulse again till everything is well combined.

Pour the cake batter into the cake pan and sprinkle the 40g of flaked almonds evenly over the top of the batter. Bake for 30-35 minutes, till the cake is golden.

Let the cake cool completely before removing from the cake pan.

Dust with a little icing sugar and serve. 🙂

IMG_20151110_222447

1447155712668


Greek – Zucchini and Fresh herb Feta Frittata

Zucchini and Fresh Herb Feta Frittata

IMG_20151105_080711

This is a dish that both my mother and grandmother both bake to perfection and even though for the sake of the recipe I have added measurements for the zucchini and the fresh herbs a little over or a little under will not alter it, it will alway taste as delicious as it should.

When zucchinis are in abundance and fresh herbs are plentiful then this bake may appear a few times as part of the dinner meal, for lunch or even breakfast.

Filling:

  • 4  Zucchini (medium sized) Grated
  • 1/4 cup Fresh chopped Mint
  • 1/4 cup Fresh chopped Dill
  • 1/4 cup Fresh chopped Parsley
  • 1 onion, finely grated
  • 3 Tablespoons olive oil
  • 3 egg yolks
  • 250g feta cheese, crumbed
  • 3 egg whites (whipped to stiff peak)
  •  1/2 teaspoon white pepper
  • Topping:
  • 1 cup parmesan cheese, grated

DIRECTIONS

  1. In a bowl mix together the grated zucchini and fresh herbs set aside.
  2. In a small fry pan add a tablespoon of olive oil and the grated onion, saute gently till the onions have softened and lightly caramelised. Add the onion to the zucchini and mix to combine.
  3. Pre-heat the oven to 170 degrees celsius.
  4. Beat the egg yolks and  olive oil together add the crumbled feta cheese, white pepper, mix into the zucchini mixture.
  5. Fold the whipped egg white into the zucchini mixture.
  6. Oil a large baking tin (approximately 20cm x 25cm) spread the mix evenly. Spread the grated cheese over the top.
  7. Bake for 35 – 45 minutes till the top of the bake is crisp and golden.
  8. Remove from the oven and allow to cool before serving.


French Sugar – Apple and Almond Loaf


French Sugar – Apple and Almond Loaf

FAAC4

Ingredients:

190g soft butter

130 g French Caster sugar (White Beet Sugar – CSR Sugars of the World)
3 eggs
190 g Plain flour
1/2 Tablespoon baking powder
60g ground almonds
30g Sour Cream
1 teaspoon vanilla bean Paste

1 Large Granny Smith apple pealed with core removed and cut into 8 wedges.

Method: 

Preheat oven to 190 ° C.

Firstly peal and core the apple, cut into wedges squeeze some fresh lemon juice over the apple pieces and sprinkle with a little sugar. Place the coated apple pieces in a bowl and set aside for the moment.

Using a standard mixer with the paddle attachment, cream together butter and sugar till fluffy and pale in colour then begin adding the eggs one by one. Be sure that they are well combined before adding the next egg.

Add the sour cream and vanilla bean paste.

Sift together the flour, ground almonds and baking powder. Add to the butter and egg batter. Mix till all ingredients are well combined.

Place cake batter in cake tin lined with baking paper, place apple slices along the top of the cake batter and sprinkle with French caster sugar.

Bake for 10 minutes then lower the thermostat to 170 ° C for 25-30 minutes. Or until a wooden skewer can pierce through the centre of the cake and is clear of any wet batter when removed.

Allow the cake to cool in the cake tin then remove and allow to cool completely on a cooling rack.

Sprinkle the cake with icing sugar and serve.

FAAC5

FAAC7

 FAAC1


Sesame Seed Dinner Rolls

There is a true beauty to baking in general, yet nothing surpasses the aroma of freshly baked bread penetrating into every corner of your home. The aroma likened to a warm hug or a heartfelt smile from a loved one you have been longing to see. For myself its been the longing to walk past the village bakery in Greece to relive a moment that has lasted a life time.

Bread1

Now I know that you might be looking at these pictures thinking …..”she’s made rings, as well as rolls”, true I took the opportunity to make the Turkish “Simit” a bread ring that is heavily crusted with sesame seeds (which I was totally obsessed with eating at all hours of the day while in Turkey a few years ago).     I uses the same method of baking as the rolls. So be brave and try something different …ps they make the perfect edible napkin rings 🙂

Bread2

Sesame Seed Dinner Rolls

Ingredients:
1 Tbs milk powder
250ml water
40g Rice Bran Oil
40g Unsalted Butter melted
1 egg
1 teaspoon salt
2 teaspoons dry yeast
1 teaspoon sugar
500g Bakers flour

Honey Wash:
2 teaspoon honey
2 Tablespoons water

Topping: Sesame seeds

Method:
Place in a bowl the flour, milk powder, dry yeast, sugar and salt mix well to combine all. Add the water, oil, melted butter, egg and mix. Using a standard mixer with a dough hook attachment knead till the dough looks smooth and elastic – on medium speed for approximately 6-8 minutes.

Cover the dough with cling film  to prevent forming a skin and leave to rest about 15 -20 minutes.

Divide the dough into 60g portion sized pieces. Shape each into a ball and allow to rest again for a further 10 minutes. Take each individual dough ball and press with your hand to open the dough to form a circle about the size of a teacup saucer. Then roll back again to the dinner roll shape.

Dissolve the honey and water. Sprinkle the sesame seeds on a small baking tray or flat dish.

Brush the tops of each dinner roll with the honey wash then roll the wet side in the sesame seeds.

Place on baking sheet lined with greaseproof paper.

Allow the dough rolls a further 30 – 35 minutes to rise.

Preheated oven at least 15 minutes prior to use at 200 degrees Celsius. 

Just before baking, use a water filled spray bottle to spray a fine mist of water over all the dough rolls. Reduce the oven temperature at 170 degrees and bake the bread rolls until golden brown approximate baking time 12 – 18minute. (All depends how big you make to rolls)

Once baked place the rolls on cooling racks.

The only thing let to do is head to the fridge reach out for the butter, rip one of those freshly backed beauties apart and lay on the butter.

Pure Joy!

Bread3

Bread5


Milk Bread for the Home Baker

image001

Home made bread has to be one of the most satisfying foods. We eat bread morning noon and night as a snack or accompanying an elaborate dinner party or a simple Barbecue. Bread has always been the corner stone of a light or main meal. A staple that even when the pantry is bare bread was enough to sustain the hunger.

Some countries are ferociously possessive of the flour and the techniques they use to produce the perfect loaf. That distinctive aroma of a freshly baked Vienna or the sour rustic notes of a crusty heavy sour dough where the smell lingers long after the bread has been devoured by hungry workers or a famished family.

Bread is one thing everyone remembers from their childhood day. Growing up and purchasing a fresh bake from the local  bakery where the dough has been lovingly shaped and proved then baked to crispy perfection. As the baker hands you one of his prized possessions he instinctively taps the bottom of the loaf ensuring the distinctive hollow sound is heard, a mark that all is well or rather baked well just before the hand over is complete.

DSC01971

Although my recipe has been adapted for the domestic oven, never the less does the technique of making bread change.

Bread Dough

Makes 1 large Vienna or 2 Cobs or 12 dinner rolls

500g Bakers Flour

2 tsp Dry Instant yeast

1 tsp Caster Sugar

1 tsp Bread improver

1 Tbs Milk Powder

1 tsp Salt

1 Tbs Unsalted Butter (room temperature)

1 Tbs Rice Bran Oil

335ml Water (approximately)

METHOD 

  1. Add all the dry ingredients and using a standard mixer with the paddle attachment on slow speed mix all.
  2. Remove the paddle and now attach a dough hook. On low – medium speed add the butter and begin pouring the water into the flour mix. Add the first 300ml then if required add the rest you really need to feel the dough if its too sticky then naturally do not add any more water or if the dough feels and looks dry then add a few extra tablespoons of water at a time to get the wright consistency.
  3. Once the dough has come together, looks smooth in appearance and you are able to do the “Window test” with a small piece of dough, then we are ready for the next stage.
  4. Stop the mixer, remove the dough hook and cover the bowl with some plastic, and leave it to rest for 15 – 30 minutes.
  5. On a lightly floured surface and a little oil on your hands remove the dough from the bowl shape into the desired shapes making sure you flatten out any large air bubbles that may have formed, place the dough onto prepared pans or trays. If you are using loaf pans then fill the with dough to just over half full with dough.
  6. Allow the dough to rest for approximately  30 – 40 minutes in the baking trays or tins. I like to put them in the oven with a cup of boiling hot water in the oven just to create a little moisture in the air as it rests. Then when ready take the dough out put it aside while the oven is heating up.
  7. 15 – 20 minutes Before baking Pre- heat the oven up-to 230 Degrees Celsius if your oven permits.
  8. Place a deep dish grill tray on any other shelf where it will not interfere with the rising dough. Place the dough on a rack in the centre of the oven and add one cup of hot water from the tap to the grill tray then quickly close the oven door to trap in the steam.
  9. Bake the dough for approximately 30 – 35 minute to a dark golden brown colour.
  10. Remove the bread loaf from the pan and allow to cool completely on a cooling rack before slicing.

Golden Gaytime Cake – Layered and Perfectly Naked

Recipe makes 1 (6 inch) layered Naked Cake

Serves 8 – 12

Equipment

1 (7 inch) Cake Board

1 (6inch) Cake Ring

1 Strip of Acetate approximately 40cm length and approximately 13 – 14cm wide

Assemble Cake Instructions

  1. Place a piece of baking paper on your work bench, invert the cake onto it and remove the parchment from the cake.
  2. Use the cake ring to cut out 2 complete cake circles which will be the top two layers of your cake and the remaining cake should be enough to cut two circle halves and scraps to fill in any gaps for 1 bottom layer.
  3. On a baking tray place the cake base, clean the cake ring and place this in the centre of the cake board. Line the inside of the cake ring with the acetate. Now we are almost ready.
  4. Place the two halves and any cake scraps you require to fill the first layer (base) to make a flat even layer.
  5. Warm the Cho-Malt Fudge Sauce spread, one fifth of the Choc-Malt Sauce over the base. (The sauce is so much easier to spread when its warmed)
  6. Spread half the quantity of Caramel Creme then sprinkle with the (small particle) Malt Crumble gently push them into the Caramel Creme to fix them in place.
  7. Spread another layer of Choc-Malt Fudge Sauce. Repeat the process for the next cake layer.
  8. Place the last layer on top spread the last amount of Choc-Malt Fudge Sauce and cover with the Chocolate Butter Cream. Garnish the top with the remaining large Malt Crumble Biscuit pieces.
  9. Place the cake in the fridge and allow to set for a minimum of 12 hours.
  10. Use a hot knife to slice and serve.


GGC9


Vanilla Bean Cake

makes 1 (12 by 12 inch) square cake

55g Unsalted Butter (room temperature)

210g Caster Sugar

60g Rice Bran Oil

2 Eggs

1 Egg yolk

1 tsp vanilla Bean Paste

110g Buttermilk

185g Plain Flour

1 tsp baking Powder

1/2 tsp Salt

  1. Pre-Heat the oven to 170 Degrees Celsius
  2. Sift the flour, baking powder and salt and set aside.
  3. Cream the butter and sugar together then add the rice bran oil, vanilla bean paste and eggs one at a time. Add the extra egg yolk. Cream till pale and fluffy.
  4. Alternate the addition of the flour and the buttermilk till both have been combined.
  5. Pour into a square baking tin lined with baking paper spread out the batter evenly and bake for approximately 20 – 25 minutes.
  6. Allow to cool completely.

Caramel Creme

280g Milk

75g Cream

100g Caramel

1tsp Vanilla Bean

25g Cornflour

50g Caster Sugar

2g Salt

3 Egg Yolks

2tsp Maple Extract

4g Gelatin (2 Sheets) or  (2 teaspoons Gelatin Powder – Bloomed)

————————————————————————–

40g Cold Butter

————————————————————————–

160g Cream

  1. Pour the milk, cream and caramel into a sauce pan and bring to a boil.
  2. Combine the cornflour, sugar, salt and mix. Add the egg yolks and whisk till the sugar has dissolved.
  3. While whisking pour the boiling milk over the egg yolk mixture a little at a time till the egg mix is tempered.
  4. Pour the entire mix back into the pot and whisk continuously till the custard creme thickens and has reached a boil. Remove from heat and add the maple extract and the cold butter. Whisk continuously till the butter has combined and the Caramel Creme is smooth.  If the custard has any lumps pass it through a strainer.
  5. Pour into a heat proof bowl cover the caramel custard with plastic wrap, press the cling film directly onto the custard to stop a skin from forming while it cools completely.
  6. Once the caramel creme is cold. Whip the fresh cream to soft peak. Place the caramel creme into the bowl of a standard mixer and re-whip till smooth. Fold the soft whip cream into the caramel creme.

Malt Crumble Biscuit

30g Low Fat Milk Powder

40g Flour

12g Cornflour

40g Malt Powder

25g Caster Sugar

2g Salt

55g Butter (Melted)

————————————————————————–

60g Malt Powder

90g White Chocolate (Melted)

  1. pre-Heat the oven to 170 Degrees Celsius
  2. Place the powdered milk, flour, cornflour, malt powder, sugar and salt into the bowl of a standard mixer with the paddle attachment. Mix all till well combined then add the butter mix till a fine crumble is formed. Pour the crumble onto a baking sheet lined with baking paper and bake for 20 minutes. The crumble should be golden and the buttery aroma should have filled the room.
  3. Allow the crumble to cool completely. Sprinkle the malt powder over the crumble and break up any large pieces of biscuit.
  4. Melt the white chocolate and pour over the crumble, using your fingers enrobe the crumble with the white chocolate. You will notice some large crumble pieces and small pieces have formed. Allow the crumble to cool and set aside about half a cup full of the larger crumble pieces aside for garnish and the rest for between the cake layers (make sure these are all about the size of rice grains).

Chocolate Buttercream

115g Unsalted Butter (room temperature)

80g Icing Sugar

1g Salt

2Tbs Cocoa Powder

————————————————————————–

55g Milk (Cold)

  1. Using a standard mixer with the paddle attachment cream the butter till pale in colour then add the icing sugar, salt,and cocoa powder.
  2. Cream until the buttercream is light, smooth and fluffy while whipping add the cold milk. (Don’t forget to scrape down the sides).

Milk Chocolate Malt Sauce

60g Milk Chocolate

80g Malt Powder

1g Salt

—————————————————————————-

200g Glucose

50g Caster Sugar

150g Cream

  1. Combine the milk chocolate, malt powder and salt in a heat proof bowl and set aside.
  2. In a saucepan combine the glucose, sugar and cream, bring to the boil remove from heat and pour over the milk chocolate and malt mix.
  3. After a few minutes slowly whisk the chocolate malt sauce until the mixture is smooth and silky. Pour the sauce in a food processor and blend till the sauce is completely smooth.

——————————————————————————–

IMG_20151024_184241


Coconut Blossom Caramel Sauce


CSR SUGAR Australia has released a beautiful range of traditionally farmed sugars. Each one with its deep rich and delicate notes of caramel, butterscotch, toffee and treacle. The unique molasses content in each gives the unrefined sugar its golden colour and decadent flavour.

So I thought I’d put it to the test!

I adore this recipe it can be use in cakes and buttercreams or warmed and drizzled over ice cream, puddings or eaten straight up with your favourite spoon or simply smear over toast.

IMG_20151027_104225

Be creative Ive made this recipe with all of the different sugars and each time its been a delicious result. So make a caramel sauce to suit your personality and your taste buds.

France – French Caster Sugar

Colombia – Panela Sugar

Sri Lanka – Rapadura Sugar

Indonesia – Coconut Blossom Sugar

Australia – Muscovado Sugar

IMG_20151027_103919

COCONUT BLOSSOM CARAMEL SAUCE

Makes about 1  1/2 cups

UTENSILS

1 x 2 Liter Heavy base saucepan

1 Candy Thermometer

1 Whisk

1 Heatproof jar with lid to store your caramel

INGREDIENTS

125g Cream

60g  French Caster Sugar

60g Coconut Blossom Sugar

60g Unsalted Butter

45g Glucose

1/4 tsp Salt

——————————–

1/2 tsp Vanilla Bean Paste

125g Cream

METHOD

Bring the 125g Cream, sugar, butter, glucose and salt into the heavy base saucepan uncovered over medium to high heat. Once the sugar has dissolved  whisk the mixture just a few times to combine and continue to boil till the mixture reaches 120 Degrees Celsius take off heat.

Add the vanilla and cream in a thin stream while whisking constantly till well combined. Place back on the heat and boil again. Remove from heat straight away. Allow to cool for a moment.

Pour the caramel into a heat proof container.

Leave to cool then cover it tightly and store in refrigerator.

Re-heat to use.

Don’t forget this caramel sauce makes a great gift too!

Enjoy 🙂