Artful is the new Rustic!

If the thought of a recipe described as RUSTIC sends shivers down your spine consider this!

“Artful is the new Rustic!

20140429_124020~2

Bread can be described as wholesome, earthy, crusty and rustic. Countries live and breath by the bread they make and have further developed a measure of quality by which a baker is referred to as, most popular being “Artisan Bread” or “Artisan Bakers”!

Why is it that a recipe handed down from Great Grand-mother to granddaughter not warrant the same respect , the feeling of deep admiration for a carefully crafted recipe measured not by grams but handfuls and the feel of the dough being carefully nurtured through every step.

“Don’t get me wrong I love the careful precision and craftsmanship produced in modern patisserie”

My point is we need to recognise that there is true art to be seen, valued and admired if only we looked closer with a child like wonder and used our sense of smell and our curiosity to enjoy the amazing baked spectacle that has been crafted together to produced a canvas of colour and long lasting memories.For all the recipes handed down for us to enjoy and to all the  “Artful Bakers”

” THANK YOU”
Pastry
Pastry
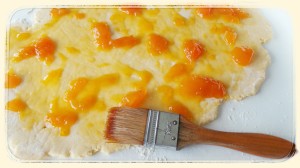
Home made Apricot Jam
Mixed Sultanas, Currants, Orange Peal
Mixed Sultanas, Currants, Orange Peal & Mixed Spices
20140429_120029~2
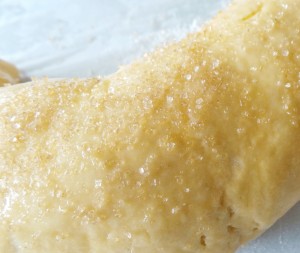
Egg wash and a sprinkle of Demerara Sugar

Ingredients:

160g Self-Raising Flour

2 Tablespoons Icing sugar

1 Tablespoon Custard Powder

100g Butter – Unsalted

1 Egg

65g Light Sour Cream

Filling:

1 cup mixed dry fruit (Sultana, Currant, Mixed Peal)

Apricot Jam (optional Raspberry is lovely too!)

Cinnamon Sugar (optional)


Egg-Wash:

1 Egg yolk

1/2 Tablespoon Milk

You will Need:

1 Baking sheet lined with baking paper

1 pastry brush

Rolling Pin

Method:

Pre-heat oven 180 Degrees

1: In a food processor add Self-Raising Flour, Icing sugar, Custard Powder and Butter process until the mixture resembles breadcrumbs. If you don’t have a food processor rub the ingredients together using your fingertips.

2: Add the egg and sourcream, bring the mixture together to form a dough ball. Do not over work the pastry.

3: On a floured surface use a rolling pin to roll out the pastry 4 – 5 mm thickness.

4: Brush the apricot jam over the pastry surface, then sprinkle with cinnamon sugar and lastly sprinkle over the mixed fruit. Gently roll the pastry. Place it on the baking tray brush with the egg wash and sprinkle the demerara sugar on top.


4: Bake till golden 25 – 30 minutes.

I hope you and your family enjoy this “Artful bake” 🙂

Happy Baking


Toffee Cream Choux – Episode 8 : The Great Australian Bake Off

maria show stopper ep 8
SS_Maria_ToffeeCream
Toffee Cream Choux

Ingredients

Toffee Cream Choux Makes 18
For the pastry
  • 1 cup plain flour
  • 100g unsalted butter
  • 1 teaspoon salt
  • 250ml cold water
  • 3 free-range eggs plus 1 additional egg yolk
  • 1 free-range egg, beaten, for the egg wash
For the custard cream
  • 1¼ cups milk
  • ½ teaspoon vanilla extract
  • ½ cup caster sugar
  • ⅓ cup plain flour, sifted
  • 3 free-range eggs plus 1 additional egg yolk
  • 1 teaspoon butter
  • 20g white chocolate
For the toffee
  • 150g a1 sugar
  • 20ml water
  • 1 tablespoon glucose syrup
To decorate
  • 24 small fondant flowers or butterflies
Utensils
  • 2 baking trays, greased
  • silicone sheet

Preparation Method

Preheat the oven to 190°C. Sift the flour into a bowl. Put the butter, salt and water in a heavy-based pan and bring to the boil over a medium heat. As the water comes to the boil, remove from the heat and dump in the flour in one go. Immediately stir briskly with a wooden spoon until the flour and liquid are evenly combined.

Place the pan back on a lower heat. Beat continuously for a minute until you have a coherent mass that comes away easily from the side. Remove from the heat and leave to cool for about 3 minutes. (If you add the eggs immediately, the mixture may curdle.)

Beat the first 3 eggs into the mixture, one at a time, making sure each egg is completely incorporated before adding the next. The mixture should be smooth and glossy. If it is too stiff, trickle in some of the additional egg yolk, beating well.

Leave to cool to room temperature. Fit a piping bag with an 18mm round nozzle and fill with the choux mixture. On a greased baking tray pipe 9 balls around the size of a walnut. Repeat with a second tray. Press the tops down with a wet finger. Brush the tops with egg wash. Bake for 15 minutes at 190°C, then lower the temperature to 160°C for a further 10 minutes until golden brown and puffy. Remove from the oven and make a small slit in the base of each ball. Turn off the oven. Return to the oven to dry out completely.

To make the custard cream, place the milk and vanilla extract in a medium saucepan and gently heat through. Combine the sugar, flour, eggs and yolk in the bowl of a freestanding electric mixer, and beat well until light and fluffy. Reduce the speed and add the warm milk in a steady stream. Once the milk has been added, return the mixture to the pan and whisk over medium heat until the sauce thickens. Remove from the heat and immediately whisk in the butter and white chocolate. Cool.

To make the toffee, combine the sugar and water in a small pan and bring to the boil. Add the glucose and lower the heat. Cook until the mixture is a warm caramel colour.

When ready to assemble, pipe a little custard cream through the base slit of each choux ball. Carefully dip each ball into the hot toffee and allow to set on a silicone sheet. Garnish while still sticky with a small fondant flower or butterfly.

20131026_131836


Pandowdy an American Classic

DSC03983

“Life is uncertain, eat dessert first” – Ernestine Ulmer

Now you might be reading this and thinking “what on earth is a Pandowdy”? Ive taken the time to look it up in the dictionary and even googled it….nothing. Im not sure where the origins of the name came from but at this moment all Im interested in is telling you all about the pastry.

Im never sure about a pastry until I have tried and tested it more than a few time with friends and family. This is probably one of my most favourite pastry’s its rustic it light and crumbly, its full of charm and a dream to work with …..all the characteristics you look for in a pastry. If you have oven proof bakeware the beauty of this dessert is that it can go from the oven to the table.

DSC03981DSC03974

Ingredients:

150g Self-Raising Flour

2 Tablespoons Icing sugar

1 Tablespoon Custard Powder

100g Butter – Unsalted

1 Egg

65g Sour Cream


Egg-Wash:

1 Egg yolk

1/2 Tablespoon Milk

You will Need:

6-8 Ovenproof Ramekins –  One serve per person

Poached fruit – your favourite caned fruit it perfect for this just drain excess liquid – Peach, Apple, Pear (are my favourites)

Rolling Pin

Method:

Pre-heat oven 180 Degrees

1: In a food processor add Self-Raising Flour, Icing sugar, Custard Powder and Butter process until the mixture resembles breadcrumbs. If you don’t have a food processor rub the ingredients together using your fingertips.

2: Add the egg and sourcream, bring the mixture together to form a dough ball. Do not over work the pastry.

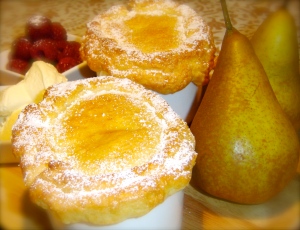
3: On a floured surface use a rolling pin to roll out the pastry cut enough pastry to completely cover the top and slightly hang over the sides of the ramekins to form a nice lid. Brush the pastry with the lightly beaten egg wash and bake till golden 20 – 25 minutes.

To serve:

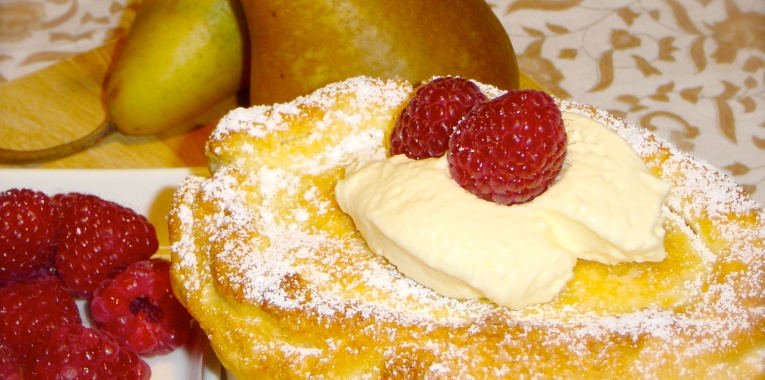
Now its entirely up to you, ice-cream or a lovely big dollop of freshly whipped cream always works for me but I have to tell you its great just on its own. Now that said it all for this pastry.

DSC01205


Inspired by recipe from “The Australian Good Taste Magazine”, 2012.


ANZAC DAY and the ANZAC Biscuit

Food from Home blog!

In my pursuit to have everyone enjoy a day of baking ANZAC biscuits I was asked a question by an overseas friend of my facebook page Food From Home “What is ANZAC what does it mean”?

Anzac Day is a national day of remembrance in Australia and New Zealand, originally commemorated by both countries on 25 April every year to honour the members ofthe Australian and New Zealand Army Corps (ANZAC) who fought at Gallipoli in the Ottoman Empire during World War I. It now more broadly commemorates all those who served and died in military operations for their countries. Anzac Day marks the anniversary of the first campaign that led to major casualties for Australian and New Zealand forces during the First World War.

Image

According to Wikipedia – The ANZAC Biscuit is a sweet biscuit popular in Australia and New Zealand made using rolled oats, flour, desiccated coconut, sugar…

View original post 660 more words

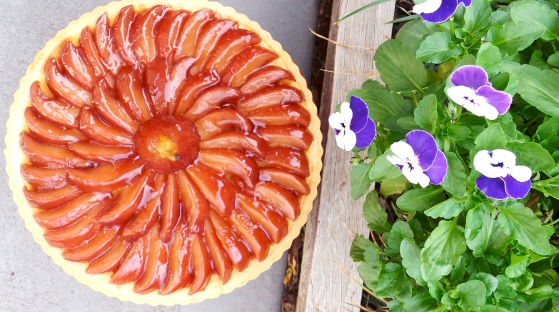
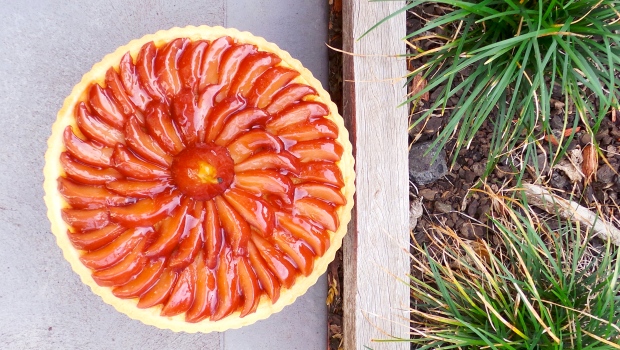
Aromatic Wine Poached Pear and Almond Tart

20140419_153152

Poaching pears in a blend of good red wine, and boosting the warmth of the poaching liquid by adding spice aromatics like a cinnamon stick, star anise, lemon and orange peal and you have a pear that will tantalise your every taste bud with every spoonful.  

Wine Poached Pears

150g Marsalla Wine

750g Red Wine

150g Caster Sugar

1 Cinnamon Stick

Lemon and Orange Peal

1 Star Anise

10-12 Small Corella Pears (pealed and seeds hulled)

Now don’t over complicate this its as easy as.

1: You will need a pot (with a lid) that will fit all your pears side by side in an upright position.

2: Add all poaching ingredients to the pot – the wine, sugar, spices and peal. On low heat stir till sugar has dissolved.

3: Peal pears and remove the core if possible leave the stems for now (you can remove after they have been poached and cooled)

4: Place the pears in the pot, lid on and allow them to poach for about 20 – 30 minutes. Test the pears to see if they are ready by piercing with a small knife if  the tip of the knife slides in easily then they are ready, under poached pears do not have a very pleasant texture.

Just a note: At this stage you can ditch the rest of the recipe, pop the cooled poached pears with the liquid  in the fridge. They make an amazing dessert on their own with a dollop of double cream, or your favourite vanilla ice-cream and for crunch place the pear on some recently baked puff pastry sprinkled with some cinnamon sugar and you have lovely individual desserts. Don’t forget to drizzle some of the poaching liquid over the top!

20140419_153127

Sweet Pastry Crust

125g Butter (cubed)

125g Icing Sugar

1 Free Range Egg

250g Organic Plain Flour

25g Almond meal

The hard work has been done its time to let the food processor take over.

1: Place the flour, butter, almond meal and icing sugar in the bowl of the food processor. Pulse 4 – 6 times till all resembles an even crumble.

2: Add the egg yolk and 1 tablespoon of cold water, pulse the flour mix again till it starts to come together. Remove the pastry dough push it all together, flatten out into a disc shape wrap in food grade plastic wrap and rest in the fridge for 10 – 15minutes.

3: Time to make the Almond creme, once again another a handheld mixer standard mixer is perfect for this job.

IMG_20140420_020519

Almond Creme

125g Butter (room temperature)

125g icing Sugar

125g Almond Meal

2 Free Range Eggs (room temperature)

1 teaspoon Queens Vanilla Bean paste

1: Cream together the butter, icing sugar and vanilla bean paste, be a little patient and don’t rush. Once the butter and sugar are pale light and fluffy in appearance add the eggs one at a time.

2: Add the almond meal, stop beating when all ingredients have combined. Set aside for the moment.

3: Pre-Heat the oven 180 Deegrees.

Tart shell filled with almond creme
Baked to a golden finish

20140419_145311

Arranging the poached pears

Assembly

1: On a lightly floured surface, roll-out the pastry about 4-5 millimetres thickness. Line the base and sides of a 26cm round nonstick fluted tart baking pan and trim the edges.

2: Fill the tart shell with the Almond Creme filling no more than 3/4 full.

3: Bake the tart on the middle shelf for approximately 25 minutes or till light golden colour. Once baked remove form the oven and allow to cool completely before removing from the baking pan.

4: Decorate the cooled tart with the poached pears.

Just a note: Baking is part science and a whole lot of creativity! So you can either cut the pears in half, or slice them into wedges and arrange them around the tart. If they are small pears they look great left whole as an individual serving. Its up to you.

Happy Baking by Baking Beautiful

Maria – The Great Australian Bake Off

Band of Bakers Australia

Instergram: BakingBeautiful


Panettone

Perfect Panattone

Lucy's Friendly Foods

I have to say that I’m quite pleased with this one. I tried to make a ‘freefrom’ panettone last year with rather disastrous results and had come to the conclusion that it was maybe a step too far. But having had some success with a dairy and egg free brioche, I thought it was  worth giving panettone another go. I’m glad I did – this recipe results in a perfectly authentic tasting and looking panettone, perfect for Christmas (or anytime as it’s so delicious), a bit bready, a bit cakey – yum!

Although my traditional Christmas cake is maturing away, smelling rather delicious, panettone is far more my cup of tea – lighter and more subtle and even the girls didnt object too much to the sultanas inside (for some reason they have a real aversion to sultanas or raisins!). Be warned though that this is homemade and without any…

View original post 213 more words

Balsamic Fudgies

You mentioned Chocolate!

Lucy's Friendly Foods

IMG_7529

When I first saw this concept of pairing balsamic with chocolate I was totally intrigued. I love both flavours – but would they work together? Surely balsamic in a cookie would just be weird! This idea has been on my ‘to do’ list for well over a year but somehow the oddness of the ingredients has made me put it to the back of the list on numerous occasions. Finally braved it this weekend. The result is actually quite subtle – a vague tang which enhances the dark bitter cocoa flavour to give a lift to a simple chocolate cookie. Not weird at all in fact.

Balsamic Fudgies (dairy-free, egg-free, nut-free, soya-free, sesame-free, vegetarian and vegan)

IMG_7542

makes about 18

  • 1 1/4 cups plain flour
  • 3 tbsp cocoa powder
  • 2 tbsp soft brown sugar
  • 1/4 cup golden or maple syrup
  • 1 tsp baking powder
  • 1/4 tsp salt
  • 1/4 cup sunflower oil
  • 2 tbsp…

View original post 127 more words

Rosemary and Olive Oil Bagels (AKA Focaccia Bagels)

Must recipe test these!

Lucy's Friendly Foods

We were in the supermarket the other day and Big S was tempted by the bagels – we used to give her bagels all the time and she absolutely loved them toasted for breakfast. However, since we found out that Little S was allergic to sesame, we never buy shop bought as they always seem to have the danger of sesame contamination (as no doubt usually made alongside bagels with sesame seeds on). So, I had all the encouragement I needed to make a batch at home.

Last time I made them I found them quite a pain to make, but the mix just worked so much better this time around. Why? One key factor was giving the yeast plenty of time to bubble up before adding it to the flour. I have to say they worked a treat – chewy on the outside and fluffy inside (maybe a bit…

View original post 301 more words

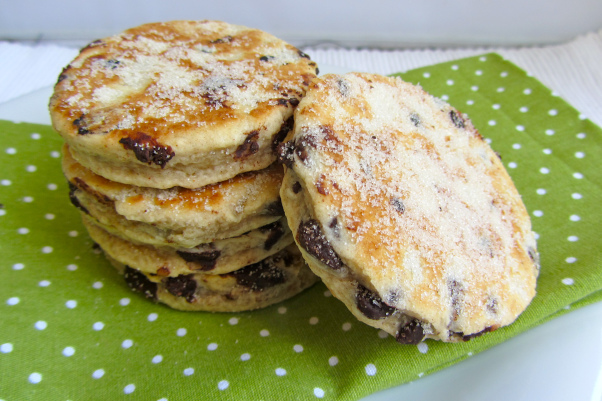
Chocolate Chip Welsh Cakes

Lucy's Friendly Foods

IMG_7521

Dydd Gwyl Dewi hapus (or Happy St David’s Day!)

This is the third variety of Welsh cakes I’ve posted – I just find them so tempting but my original variety wasn’t very popular in this household as the others just don’t seem to like dried fruit. So with St David’s Day today, and D celebrating not only his ‘Saint day’ but also a return home from working away, I decided to make a variety that would appeal more to the younger members of the household. Boy, did they like them! Maybe if I sneak the odd sultana in when they’re not looking they might come to love the traditional variety as much as I do!

I found jam didn’t really work with the chocolate so we opted for dairy-free spread on its own.

Chocolate Chip Welsh Cakes (dairy-free, egg-free, nut-free, soya-free, sesame-free, yeast-free, vegetarian and vegan) N.B. to make gluten-free…

View original post 176 more words