Episode 3: The Great Australian Bake Off – Gingerbread

The important lesson here is that there is a difference between the lovely aromatic soft and chewy gingerbread biscuit you can make or buy form the store and the type of recipe required to construct a house, tower or multiple piece structure. I loved the idea of Monique’s “City of Churches” construction to say the least it would have been adorable had she used a different recipe. The gingerbread was too soft and she was unable to get the panels to hold up to the weight, coupled with the fact that it was a warm day and the chocolate that was smeared on the panels didn’t set completely and added no support, such a shame.

There is a difference!

Using the correct type of gingerbread recipe will produce pieces that after baked will have a dryer, brittle, crunchy texture and therefore you will need to use a template to cut out all the necessary pieces for your structure before baking. Then allow them to cool completely before beginning your construction.  Your gingerbread pieces will need to be bonded together and hold weight of other pieces or the addition of decorative items like lollies or chocolate etc.

It’s also important to note that just because the texture of the gingerbread is dryer, the flavour and heady smell of spices is still present. The joy of taking part in devouring the gingerbread loses none of its festive appeal, especially when its accompanied by a great cup of tea or coffee or just a little something sweet for morning tea.

These are some of the amazing gingerbread constructions I have come across in my travels. Each and everyone of them were constructed with multiple pieces and generous amounts of colourful sweets to entice a smile from your inner child. I wonder what Hansel and Gretel thought when confronted with these gingerbread houses!

My very first Gingerbread house

Although a very traditional construction the end result was confronted with two dilemmas, the house looked too cute to destroy and secondly, who was going to be the first to begin the destruction. As I had made the gingerbread house the task was put upon me. “Quick, we need a cup of tea please”.

Gingerbread Spices

The traditional spices used in gingerbread have always been:

Ground Ginger

Ground Cinnamon

Ground Cloves

As every construction will need a different quantity its best to make smaller portions of the gingerbread dough and if you have any left over dough use a cookie cutter and make delicious biscuits. Just remember be mind full of the time as smaller pieces bake quicker than the larger ones.

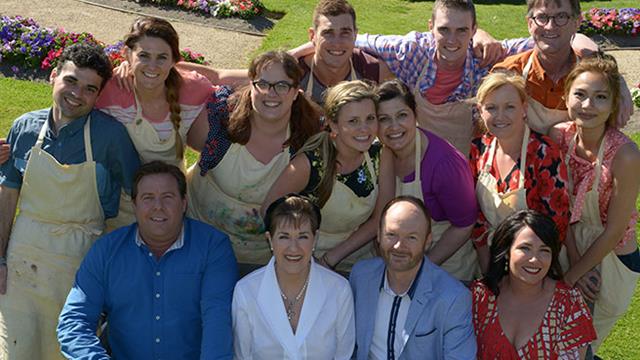
This is a picture of the “Eiffel Tower in Bloom” the construction I made on episode 3 of “The Great Australian Bake Off”. Although I am still a little disappointed having to alter the overall look of the tower at the last minute. Im still very proud of the effort under such a trying environment……I would still happily sit bake with my favourite hot beverage and enjoy eating it!

ep3_10_mariastower

maria ep1 969343_10151547185759150_32456383_n ContestantsWalk

Episode 2: The Great Australian Bake Off – “Pie” How to avoid a soggy bottom!

Aromatic Braised Beef Pie with Swiss Brown Mushrooms & Broad beans

S_BraisedBeef

For the recipe to my Aromatic Braised Beef Pie and other contestants pies please follow the link bellow.

Maria’s Aromatic Braised Beef Pieninem.snPie Recipe

Image

71857_212338778919863_1764402329_n

Pie Week!

When I think winter baking, I think PIE!

Apple pie, Chicken pie and Beef pie these are the three pies that are bake almost traditionally in our house hold and every year there is always a little twist on the filling something new or just the delicious original recipes!

Its important to note that the publishers decided to change my pie recipe slightly but either way you make it will still be delicious. Choosing to make only the pie top still has many of the same principals and I will list a few helpful hints to avoid the dreaded soggy pastry!

Image

 These are my top hints to remember when preparing pastry: For a Home baked Pie! 

1: Once you have made your pastry wrap it in plastic wrap and allow it to rest in the fridge for 10 – 15 minutes. Remember this type of pastry just needs to be gently pressed together NO KNEADING you don’t want to encourage the gluten to form any quicker or risk melting the butter with warm hands and overworking the dough.

2: After you have rolled out your pastry and covered the base and sides of the pie tin have a close look at the pastry if you think it looks a little thin in areas then use the excess bits of pastry to patch these areas and make them thicker.

3:Brush the pastry with egg white then place the pastry back into to fridge to cool and rest for a further 10 minutes. Doing this will further stop the pastry from becoming soggy.

4: Always completely cool your pre-cooked pie filling before adding it to your pie case. If the filling is even slightly warm it will melt the butter in the pastry and soak through hence the dreaded SOGGY BOTTOM!

5: Always Pre-heat your oven before baking. The oven will need up to 10 – 20 minutes to reach the temperature required to begin baking. An internal hanging oven thermometer is great if you are unsure.

I have always maintained that baking if FUN and the results of your labour are truly worth the effort but baking is not quick!                    It is essential to follow these simple rules as even the simplest recipe has crucial steps.

Image

Image

Image

Image

Image

The Showstopper Challenge – Party Pies, Pasties and Sausage Rolls

Party Pies and Pasties

These are my assorted savoury party treats.

The Checkerboard Cake – Step by Step

20130714_194524

Now as you look through the pictures you will notice that there is another baker in the house today. My husband who has never baked before has chosen to spend the cold wet Melbourne day baking. He has been all inspired by the checkerboard cake and decided that this was going to be todays challenge!

For this recipe please click on the link below.

Recipesgabo.ninemsn.com.auFancy a bit of baking? Download recipes from Australia’s biggest baking reality series and try your hand at recreating them at home.

These are a few step by step pictures to help you along when making this cake and also some tips and hints to remember.

Step 1

Preparation is the key to all successful bakes,

Pre-heat the oven

Measure out all your ingredients

 Prepare your baking tins

Unless otherwise requested all ingredients should be at room temperature.

Step 2

You begin by aerating the butter, sugar and oil, till pale in colour and has a fluffy appearance add the eggs one at a time and remember to stop the mixer and scrap down the sides and  bottom of the bowl making sure all ingredients are mixed in well

I have chosen to alternate the addition of the dry ingredients – Flour and wet – Milk and juice while the mixer is on a medium speed

Divide the batter between the two cake tins and bake for approximately 45minutes

Please try NOT to open the oven door till your cake is at least 3/4 of the way through its set baking time…..resist the temptation to open the oven door!

Use a metal or wooden skewer to pierce the centre of the cake, it should come out clean if its sticky then leave the cake in the oven for a further 5 minutes and try again.

Once the cakes have baked allow them to cool in the tin for 5 – 10 minutes then flip them onto a cooling rack

Follow the same steps to make the Chocolate cakes

Step 3

While the final cakes are baking its time to prepare the Chocolate frosting

Bring the butter, water and brown sugar to a simmer, if the liquid has accidentally boiled remove it from the heat and allow it to cool down a bit before adding the chocolate (If you add the chocolate into boiling liquid it will burn and become grainy in texture) Once you have added the chocolate use a whisk and keep stirring till the chocolate and butter liquids become smooth and glossy…..YUM!

Pour it into another bowl and set aside to thicken and become spreadable

A copy of the template is in The Great Australian Bake Off Book that you can trace to use

20130714_141947

Step 4

To get perfect looking squares you need to level the cakes first, this will require slicing the tops off all four cakes so that they are now flat and equal height

Once all the cakes are level, use the template to guide you around cutting the rings. Take your time its delicate and a little fiddly but so worth the effort.

Ok as a little reward for all that cutting and levelling stirring and baking I think a little tasting is in order.

20130714_171344

Step 5

The assembly is a the fun part all the cakes are cut so its time to apply the frosting around the edges of the inner circles and reconstructing the cakes. You will need to alternate the colours to achieve the desired checkerboard result.

After completing each cake a good layer of frosting is spread and the next cake is constructed on top.

*Just a note you need enough frosting so that the rings will stick together but not so much frosting that the cake is swimming in frosting.

Step 6

Reserve about 3/4 cup Chocolate frosting for final decorations (set aside)

Once the cake has been constructed its time to pour the remaining frosting over the cake and using a pallet knife or cake decorating spatula evenly distribute the frosting around the cake

At this point you might like to experiment with different patterns like creating swirls, lines or just making the edges smooth

Using a piping bag with a star tip decorate the edges and grate some orange zest around the edge, this is the fun part and its entirely up to you

This is the sensational finished result………and what looks like one very exhausted but very proud Baker!

Prior to The Great Australian Bake Off I too have always seen and heard of the checkerboard cake but never attempted it. It is a gorgeous cake and the possibilities are endless when it comes to flavours although I love Chocolate & Orange I think I might make a Chocolate & Mint one in the very near future. I hope you all take the opportunity to bake the Checkerboard cake too. Enjoy.

2013-07-12 23.39.08

Episode 1: The Great Australian Bake Off – Cake

Children’s Party Cake

Vanilla and Raspberry Marble Cake with Pink Chocolate Mousse

Image

I wanted to make a wonderful girly cake that had bursts of pink, butterflies and flowers a magical garden that would sparkle and delight. The original design had might I say alot more decorations on the cake but under the circumstances Im proud of my cake and delighted by the judges Kerry Vincent and Dan Lepards comments. I hope you all enjoy it too!

Image

1 quantity of batter for a 10inch cake pan or two 7inch cake tins.

This cake will require 3 quantities of batter I made two 10 inch cakes and two 7 inch cakes.

Cake

Ingredients:

3/4 cup Rice Bran Oil

1 3/4 cup Caster Sugar

4 Eggs and 2 egg yolks

1 teaspoon Queen Vanilla Bean Paste

3 cups Lighthouse SR Cake Flour

1 teaspoon Baking Powder

1/2 teaspoon Salt

1 1/4 cups Buttermilk

2 teaspoons Raspberry Flavouring (available in most cake decorating stores)

Method:

Pre-heat the oven to 180C

Grease and line a 10 inch cake tin or two 7 inch tins with baking paper and set aside

1: Sift the flour, baking powder and salt into a bowl and set aside

2: Beat the sugar and eggs together till light and fluffy then add the oil and vanilla

3: Begin adding the flour and buttermilk alternating, mixing on a low speed so as to fold through to a smooth batter

4: Remove 1/2 a cup of batter and put aside in a bowl, pour the remaining cake batter into the cake tin

5: Add the raspberry flavouring to the reserved cake batter and mix well, pour this in a continuous stream over the vanilla batter and using a butter knife zig zag through to create a marble effect (remember not to over mix)

6: Bake for approximately 45 -50 minutes for a 10 inch cake 35 minutes for the 7 inch cake or till a skewer that has been inserted in the middle comes out clean

7: Once the cake has been baked allow it to cool completely in the tin before removing

Pink Chocolate Mousse

Ingredients:

750g Nestle White Chocolate

2 1/2 cups Cream

2 – 3 drops Pink food Colour

Method:

1: Bring 1 cup of cream to a simmer and pour over the chocolate stirring till the chocolate has melted and the cream are now a smooth paste. Set aside to cool to room temperate

2:  Whip the remaining cream and allow it to come to room temperature ( if the cream is too cold when you fold through the chocolate may seize and become grainy in texture) Fold through the chocolate mix and the whipped cream ( try not to over mix as you will loose the air out of the whipped cream)

Fondant

2 1/2 kg of White or pre mixed fondant

* Kneed you fondant well to remove any air bubbles and roll out 3-4 millimetre thickness

Use plunger cutters to create the flowers and butterflies use a sugar syrup or royal icing to attach these to the cake

Assembling your cake

1: Carefully cut the tops off your cakes and then slice them in half

2: Spread 3/4 cup full of the mousse between each layer of the large cake and 1/2 between the layers of the small cake (* To create an even surface on top use the base of the cake on top)

3: Once you have filled the cakes use the remaining mouse to cover the exterior of the cakes, smooth the edges and place the cake in the fridge to become firm.

4:  Cover with fondant and carefully smooth the edges and cut away any excess

5: Both cakes need to be placed on cake boards and to assemble you need to insert support structures like wooden cake dowels (these can be bought from all good cake decorating stores)

6: The decorating is all up to you I always like to draw a design first and then put the finishing touches in the cake

Image

Image

Image

 Episode 1 – Star Baker Maria

Let the Office “Bake Off Bonanza” begin!

Possibly the best way to start the day!

2013-07-09 12.41.44

This morning I was invited to be a guest judge with Managing Director Ian Paterson of Channel Nine Melbourne for the

“Staff Bake Off Bonanza”

To celebrate the premier of “The Great Australian Bake Off”. Staff were invited to bring a bake, sweet or savoury!

As I looked around at the beautiful display of home baked cakes, pies, tarts and biscuits there came a comforting thought…. Im not the one being judged today! I realised I wasn’t the one feeling nervous although I remembered all the nail bitting moments waiting to hear the judges comments. “Baking is a defining force in my life” no wait that’s Kerry Vincent’s line……!

After tasting so many great bakes and not a soggy bottom to divide them it was a difficult decision. The flavours of mint and cherry, banana and toffee then of course the peanut butter and chocolate STOP my taste buds have gone into overdrive! The sweet sensation of sugar is now coursing through my veins………..”I love them all can’t they all win”

Congratulations to ALL the bakers today a sensational effort of delicious deserts and savouries you delivered on flavour, creativity and presentation.

“Baking is a comforting passion”…… now thats more me!

Bake Against Bake!

The stage is set and the Judges and Hosts are all ready for

” The Great Australian Bake Off”

Starts Tuesday the 9th of July at 8.00pm on Channel 9

First radio interview today with Station: 7ad, 7sd, 7bu – Tasmania
Announcer: Marc and V
Producer: Marc McCreadie

I heard a little sound bite of myself and the theme music to the show in the background before the interview began one of those unreal moments!

Contestants

This slideshow requires JavaScript.

There will be regular updates and lots of pictures so stay tuned.

Happy Baking

The Great Australian Bake Off Starts Tuesday July 9 | reality ravings www.realityravings.comAfter many months of promos The Great Australian Bake Off will now start on Tuesday 9 July on NINE at 8pm. Anna Gare will host the show with Shane Jacobson