Apricot & Orange Blossom Pudding

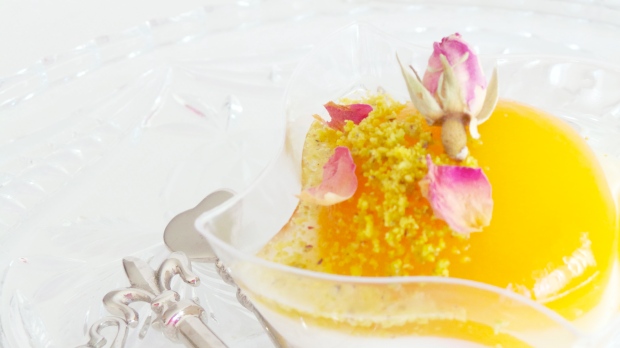
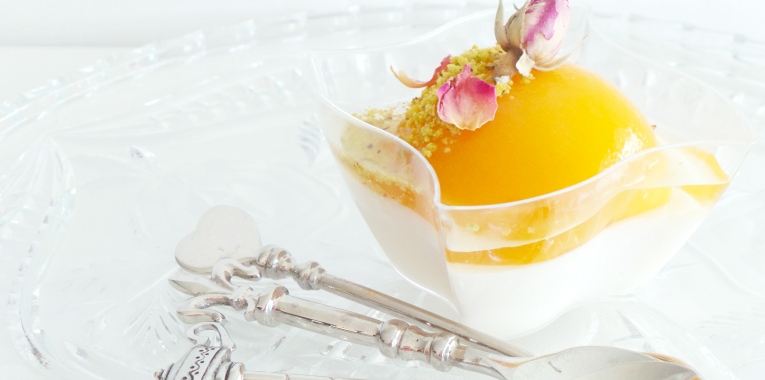
This delicate dessert has all the looks of showstopper without the forty steps of a complicated recipe. I love custards and especially a french egg and vanilla bean creme pastry but this milk pudding is egg free and thicken with cornflour. Ive gone a little off the norm by using stevia to add sweetness and poached fruit.

20140717_155427~2

Lets start with I don’t know the exact origins of this pudding and at the risk of looking it up on Wikipedia it appears as a dessert loved by many different cultures. Lets face is desserts should have no boundaries. Flavoured with lemon in Italy, rose water in the Middle Eastern also called “Muhalbiyah”.

The Greek pudding called “Alevria” which can also be lactose free is often made with a reduction of grape juice to make a syrup or the milk version flavoured with mastic or orange blossom water. It is the Greek versions that I am most familiar with and most probably the first ever custard I ate as a child.

A variety of toppings common in to both the Middle east and the Mediterranean almost always include crushed walnuts or pistachios and spices like cinnamon.

Ive add poached fruit and its juices for freshness, like apricot halves but peaches are also perfect and if you preferred passionfruit or a raspberry coulis then go for it.

This pudding is flavoured with orange blossom water and a sprinkling of crushed pistachios and for added decadence Ive added a few dry edible rose petals.

20140717_155230

“Apricot & Orange Blossom Pudding”

4-5 serves

Ingredients

500ml Milk

40g Stevia

35g Cornflour

1 tablespoon Orange Blossom water

5-6 Poached Apricot halves reserve the juices

50g Pistachios – Crushed

Method

  1. In a medium saucepan add the stevia and the cornflour mix well.
  2. Add Milk and whisk together till no lumps of cornflour are visible.
  3. Continuously stir to stop it from sticking to the bottom of the pan. Mix while on medium heat till it thickens and large bubbles rise to the top and keep mixing for a further 1-2 minutes. Remove from heat and add the orange blossom water stir to combine.
  4. Pour the pudding into individual heat proof ramekins
  5. Allow to cool to room temperature then cool in the refrigerator
  6. Top with an apricot half, pour a little syrup over the top and sprinkle with crushed pistachios.

*For extra decadence Ive used edible dry tea rose for a little WOW! Factor 🙂 …………………..(I purchased the roses from T2 the tea shop)

*This recipe can be doubled if required

*Fresh edible flowers can be used (please be mindful to purchase these for consumption purposes as you do not want to be serving up flowers sprayed with pesticides)

20140717_155206~2

Walnut Soda Bread

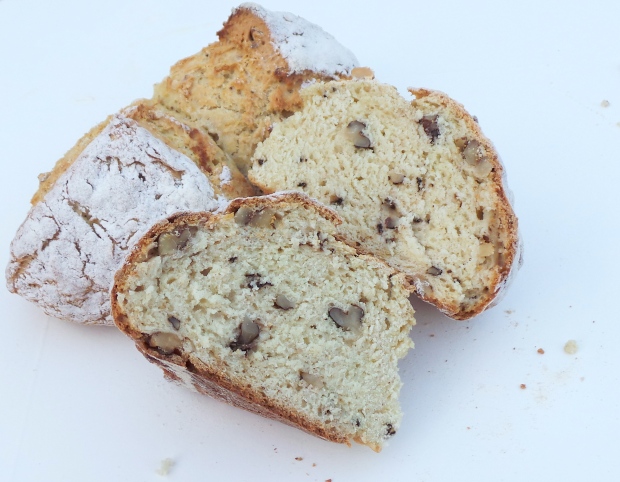
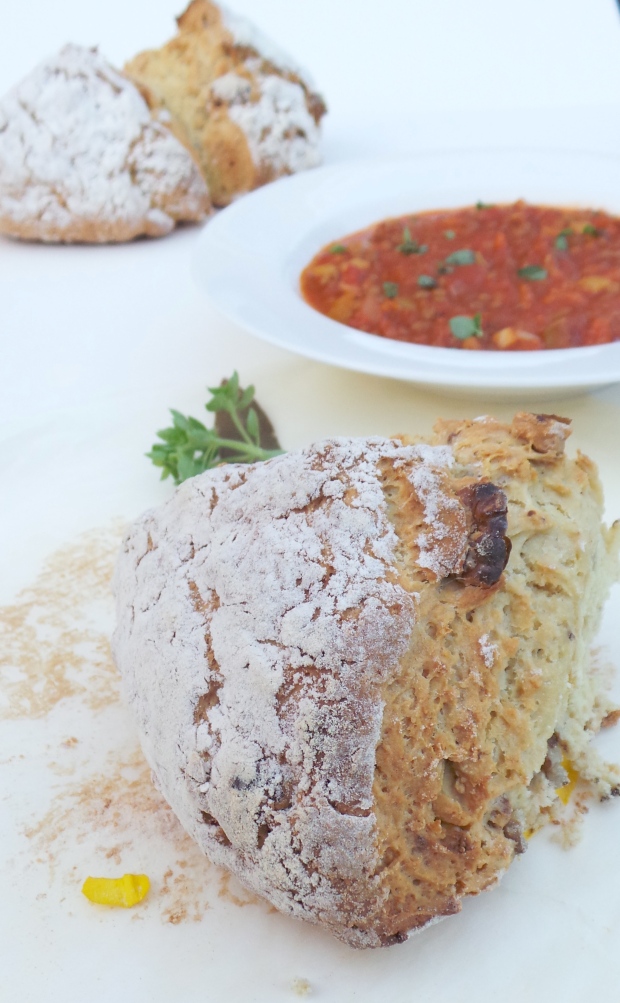
I have one recipe and about 100 variations of a classic soda bread. The original recipe was in a very old cookbook (in ounces and measurements which make me think it was all estimated)  I found it in an opportunity shop in Bendigo, country Victoria, Australia ….…(A little travel information for my non Aussie friends). Now Im going to pay it forward. This is my version of a Walnut Soda Bread and it sounds fancy but its oh so easy.


Soda Bread 2

20170314_191740

Every time I make a soda bread I find my faithful recipe and depending on whats cooking the recipe will be adjusted to compliment the main meal. *Pairing flavours to suit the meal, herbs, walnuts, olives, parmesan or pine nuts these are a few ideas.

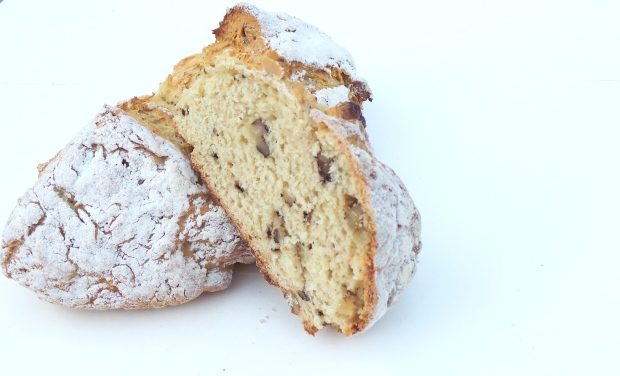
Today its just simply adding crumbled walnuts as Im going to be serving it with my Greek lentil soup. The addition of walnut will add texture and flavour to the overall meal.

Flour, buttermilk, salt, sugar, walnuts and bicarbonate of soda. The oven is always preheated and after a little very light kneading, shaping and a dusting of flour and four purposeful cuts to the dough ball its into the oven…..now I hope I didn’t make that sound too complicated.

Remember this is more like a scone than a traditional bread….so keep the kneading to a bear minimum. The technique to making a great soda bread is to minimise the formation of long gluten strands so KEEP IT SHORT 🙂

20170314_191632

“Walnut Soda Bread”

Ingredients

500g Plain White Flour or Bakers Flour

1 teaspoon Salt

1 teaspoon Caster Sugar

2 teaspoons Bicarbonate of Soda

60g Walnuts (roughly chopped)

420ml – 450ml Buttermilk

extra flour for dusting

Method

Preheat your oven to 190 Degrees Celsius

  1. In a bowl add all the dry ingredients and mix well.
  2. Add the buttermilk without too much force or kneading bring the dough together into a ball
  3. Place the dough ball onto a tray lined with baking paper or alternatively you can dust the base of the baking tray with more flour and place the dough directly on top
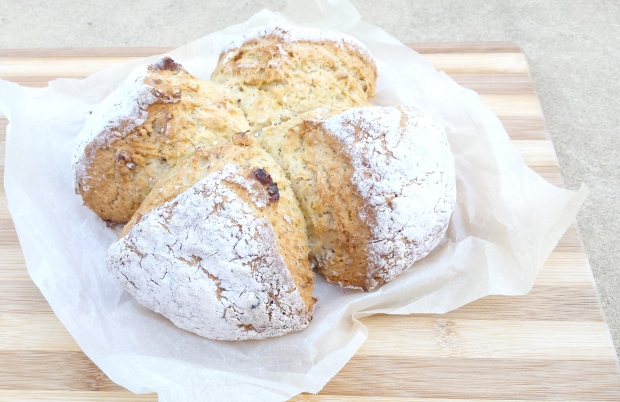
  4. Dust the top of the dough with flour and cut a cross through the top straight down to the bottom creating four quarters.
  5. Place into the oven for approximately 35 – 45 minutes.

As the Soda Bread bakes it will rise and expand. You want it to have a lovely golden crust on the outside.

Once baked cool the soda bread on a cooling rack.

*Just a note as you can see from the pictures the extra flour you added over the dough ball before you baked it will NOT necessarily turn golden so look for the baked signs on the expanded surface of the soda bread.

20170314_191714

20170314_191157

Soda bread 3.jpg


Lentilicious Greek Lentil Soup


This Greek soup is a staple, this thick moorish soup will have you printing out this recipe and permanently fixing to your pantry door for quick reference……….or is that just me!

20170314_191157

Although Im not a vegetarian I do love my vegetables and pulses, this is one of those dishes that always made young Greek children giggle as its name “Fakes” AKA Lentils sounds a little rude but when I was growing up it was always a dish we looked forward to. Oh, ps yes we still get a giggle out of the name…… priceless 🙂


20170314_190630.JPG

Served with fresh crunchy bread either slathered with butter or  just used as a mop to scoop up more flavour. (Ive also served it up with the addition of crumbled feta or grilled spicy chorizo, see  * note bellow 🙂

Greek Lentil Soup

Serves 4 

Ingredients
1 x 400g cans of brown lentils rinsed
1/4 cup Extra Virgin Olive oil
1 brown onions, chopped fine
1 small leeks chopped diced fine
1/2 teaspoon cloves garlic, crushed
1 Lg carrot, grated
400g finely chopped tomatoes (fresh or good quality canned)
2 tablespoons tomato paste
1 bay leaves
1/2 teaspoon dry oregano

400ml Hot Water or good quality Beef or Chicken Stock

3 Tablespoon Worcestershire Sauce (I know thats not Greek but it works well….trust me)

Salt Flakes
Cracked Pepper

Crusty bread for serving

Method

Rinse the lentils in cold water, drain and set aside.

Heat 3-4 tablespoons of olive oil add the onion, leek and bay leaf and saute for approximately 3 – 5 minutes on moderate heat stirring constantly so as not to burn.

Add the garlic, grated carrot, tomato paste and chopped tomatoes. Mix all to combine.

Add the lentils, tomatoes and hot water, mix and simmer with the lid on the pot for approximately 35 minutes. If your soup has reduced to quickly add another cup of liquid.

When you are ready to serve add the Worcestershire Sauce, season with salt and pepper and stir through the remaining olive oil.

Finally taste and check the seasoning. (For a little extra heat add half a little dry chilli flakes Ill leave that up to you 🙂

*If you forgot the fresh crusty bread don’t forget Soda bread is another great option especially a Walnut Soda bread. Another option is a good crumbling of feta and a sprinkling of freshly chopped oregano.

*To satisfy the meat eaters of the family a chorizo sausage sliced and grilled added to the dish is another flavour sensation. Reduce the amount of salt and instead boost the flavour by adding a couple of Beef stock cubes or chicken instead of just salt.

Walnut Soda Bread

20170314_191740.JPG

Kali Orexi

Maria


Gingerbread Angels

Christmas just isn’t the same if I don’t bake gingerbread Angels, Deer or Gingerbread Men!

…. well if Im honest there will always be something baking.

img_20151216_210506

I love this spicy biscuit especially when just baked. Who needs exotic air fresheners when all you need to do is a little baking. The warm aromas of Ginger, Cinnamon, Nutmeg and All Spice will have you reaching for the kettle and sitting down with your favourite brew in one hand and a Gingerbread Angel in the other.

I’ve been asked a few times and its worth noting that to build a gingerbread house the dough is a little different slightly dry and once baked not as soft and fluffy as the gingerbread men you might be familiar with. My recipe can be used for both individual biscuits like these angels or if you want to make a gingerbread house. After baked the biscuit is crisp but after a few days they begin to soften slightly.

To decorate the angels or other shapes I like to use Royal Icing and a few soft shell sugar pearls and sprinkles to add a little glam like the red and green and red garland wreath or the gold sugar crystal hearts its really up to you. In the past Ive also used 100’s and 1000’s and they look great too. I hate to admit this but its all up-to the Christmas Tree and the overall household decorations  that dictate that years colour theme…..That’s a bit over the top but then again thats me!

img_20151216_191902

You will need:

Rolling Pin

Baking trays

Baking Paper

Cookie Cutter (Angel, Reindeer, Santa) Ive used Angel

Ingredients:

100g Unsalted Butter

200g Soft Brown Sugar

150g Molasses

150g Golden Syrup

1 Egg

700g Plain Flour

1 teaspoon Baking Powder

1 teaspoon Ginger powder

1 Tablespoon Cinnamon Powder

1 Tablespoon Mixed Spice

1 teaspoon Bicarbonate of Soda

1 teaspoon White Vingar

A little extra flour for dusting your work surface

Method:

  • Bring the butter, Molasses and Golden Syrup to a gentle simmer mix well, remove from heat, allow to cool.
  • Sieve the flour, baking powder, Mixed spices, Cinnamon and Ginger together and set aside
  • Add the egg to the cooled butter syrup and mix well
  • Mix together the Bicarbonate of Soda and Vinegar, mix into the butter syrup
  • Add the butter syrup to the flour, fold through to make the dough
  • Wrap the dough and rest in the fridge before rolling out for baking.
  • Pre Heat oven to 180 Degrees and bake biscuits for approximately 12 minutes

Remove the dough from the fridge. Very lightly sprinkle some flour on your work bench. Roll out the dough to about 3-4mm thick. I like to dip the cutting edge of the cookie cutter into the flour shake off the excess and then cut the shape (repeat till you have cut out all) Gently lift the dough shapes onto the prepared baking trays. Leave a good 1-2cm between each shape.

Bake the gingerbread for about 12 minutes (you know your oven, sometimes they run hotter than others so watch the first batch and adjust your time accordingly). Allow the baked gingerbreads to cool slightly on the baking tray before you move them to a cooling rack to cool completely before decorating.

To decorate your Gingerbread you will need some

Royal Icing

Small Pipping Bag

Sprinkles – Ive used Queens White Soft Shell Pearls (which are great ….No more chipped teeth using the other hard ones “Great Ideas Queens”

Mixed Red and Green Sprinkles for the Garland Wreath

Black or Brown Food Colour Pen to draw on the face (which can only be done after the royal icing has completely dried……don’t be tempted to do it any sooner, trust me! )

Step 1

Fill the piping bag with royal icing (2-3 Tablespoon full) cut the tip of the piping bag so that you can pipe a line. If the royal icing is too runny thicken it up with a little more icing sugar or if too thick add a tiny amount of water (a little goes a long way)

Step2

Trace the shape of the angel all the way round, allow this to dry as you finish the other baked gingerbread.

Step 3

Once the outer edge is dry, time to fill it in. This time you want the royal icing to have a little movement so that it will spread easy but not run away ….if you know what I mean 🙂 Using the same piping fill it with the royal icing again and slowly fill in.

Step 4

Once again wait till the royal icing is dry before you continue with this step. To make the Garland wreath pipe a ring of royal icing onto the angel and sprinkle with the sprinkles. Allow it to set and then shake off the excess. For the hallow pipe a line of royal icing and then gently place the soft shell pearls across and allow to set dry.

Now the rest is up to you! I like to put the angels in clear food / lolly bags tie some colourful ribbon over the top and give them as gifts. Ive used them as name cards for Christmas lunch. Ive even used them as ornaments on the christmas tree. What ever you choose to do Im sure they will be enjoyed by all.


img_20151216_210634

img_20151216_191714


Lucy's Friendly Foods

There’s not a great deal to say about these other than they’re part brownie, part cookie… they’re chocolate brownie cookies! So they have that soft chocolate texture in cookie form, and they taste just like brownies. Best of both worlds, right? They got a thumbs up here anyway.

Chocolate Brownie Cookies (dairy-free, egg-free, nut-free, soya-free, sesame-free, vegetarian and vegan)

IMG_6275

makes 10-12

  • 1/2 cup plus 2 tbsps plain flour
  • 1/4 cup cocoa powder
  • 1/4 tsp baking powder
  • 1/2 tsp bicarbonate of soda
  • 1/3 cup sugar
  • 1/4 tsp salt
  • 1/4 cup sunflower oil
  • 1 tsp vanilla extract
  • 3 tbsps oat milk
  • 1/2 cup chocolate chips

– Preheat the oven to gas mark 3

– Line a cookie sheet with parchment

– Sift together the flour, cocoa, baking powder and soda. Stir in the sugar and salt.

– Pour in the oil, vanilla and oat milk.

– Bring together to a dough.

–…

View original post 61 more words

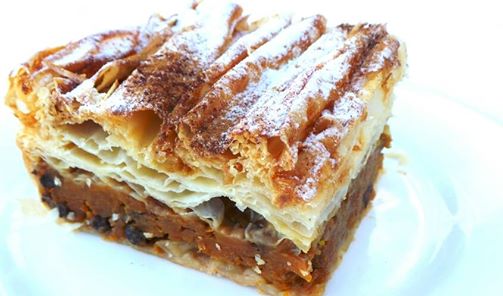
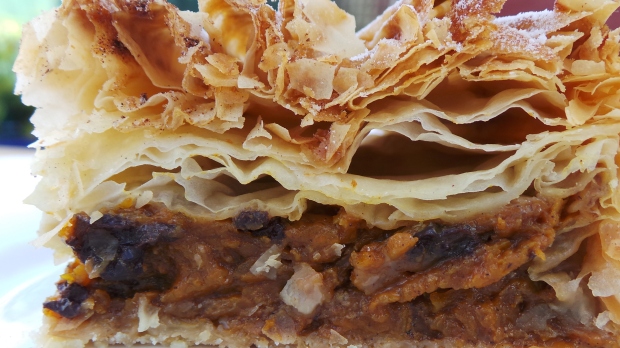
“Kolokithopita”….Greek Ruffle Sweet Pumpkin Pie

13233119_10153654524032709_2693906261553550733_n

Now I know there aren’t that many ingredients and well the method seams relatively simple but trust me this is BIG on flavour.

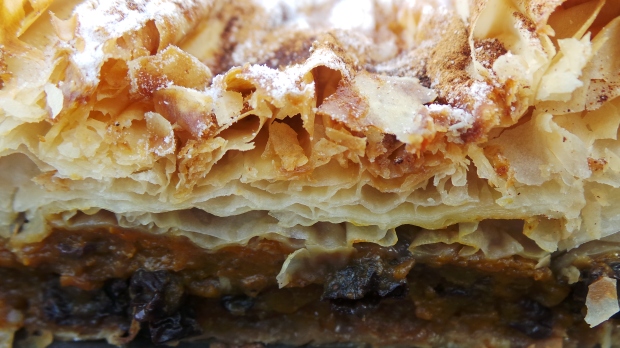
This is my favourite childhood dessert. My mother was taught by my grandmother and I make it for my friends and family too. I love pumpkin and I’ve made this pie for friends that have never enjoyed eating this glorious orange coloured vegetable as a savoury addition to a meal  let alone as a dessert…….and “they have loved it”. The aroma of it baking in the oven, the butter caramelising the fillo pastry and the smell of the sweet spiced pumpkin makes for one heavenly combination.

20160621_123358

20160621_132929

20160621_142440

20160621_143121

20160621_143338

20160621_143752

20160621_144202

Utensils:
1 large bowl
1 Vegetable grater
1 Deep baking pan 25cm x 25cm x 5cm (a little bigger is ok)
1 pastry brush

Ingredients:
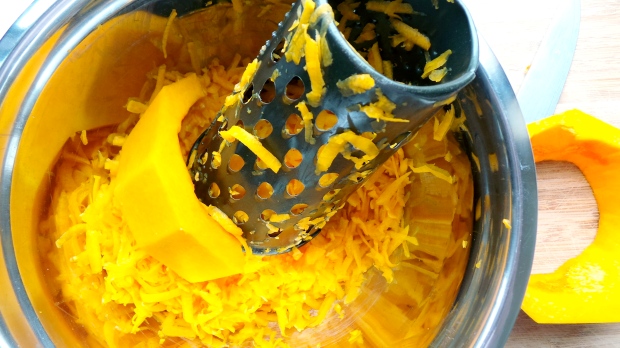
600g Pumpkin (peel and seed discarded the pumpkin flesh grated)
80g Sugar (I like to use Coconut Sugar)
80g Currants
1/2 Tbs Cinnamon powder
1/4 tsp Clove powder
1/2 Orange Zest only (optional)
1/2 tsp Salt
1pkt Fillo pastry
100g Unsalted butter melted (cooled to room temperature)
30g  Rice Bran oil

Method:
1: Grate the pumpkin and place in a deep bowl

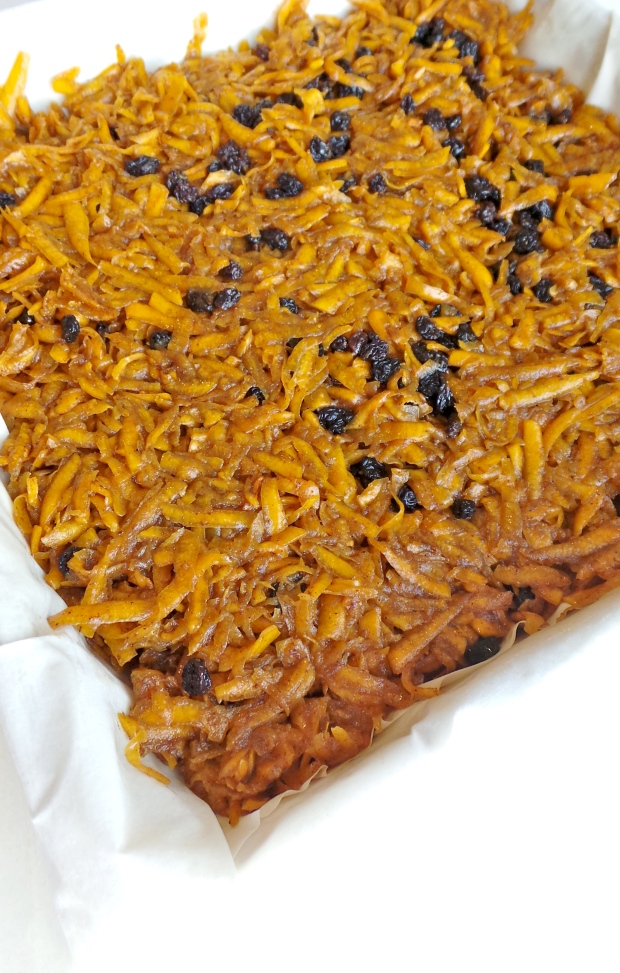
2: Add the sugar, currants, spices, salt and orange zest mix well cover the bowl with cling film and set aside for approximately 30 minutes.

When you are ready to assemble preheat the oven 170 Degrees(fan forced)

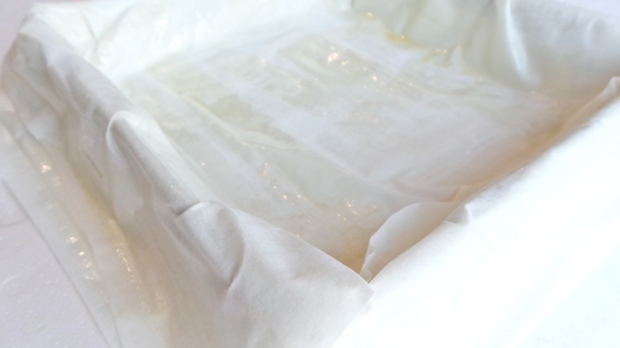
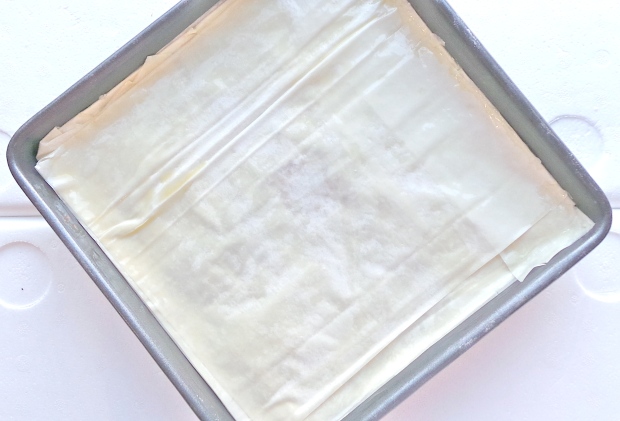
3: Butter the deep baking pan. Lay flat 1 sheet of fillo pastry and brush 
with butter line the inside of the baking dish then repeat with the next 
filo pastry sheet till you have 4 pastry sheets lining the base and edges. 

*You will need to be a little creative when you lay out the sheets making  sure to cover the edges and leave any excess hang over the lip of your 
baking dish as you will flip it over when you have added the filling.

4: Pour the pumpkin filling in spread evenly. Fold over any over hanging 
pastry. Butter 2 more sheets of pastry and lay them over the top of the filling - make sure to fold over and execs pastry this time so that all the 
top layer is nice and flat.

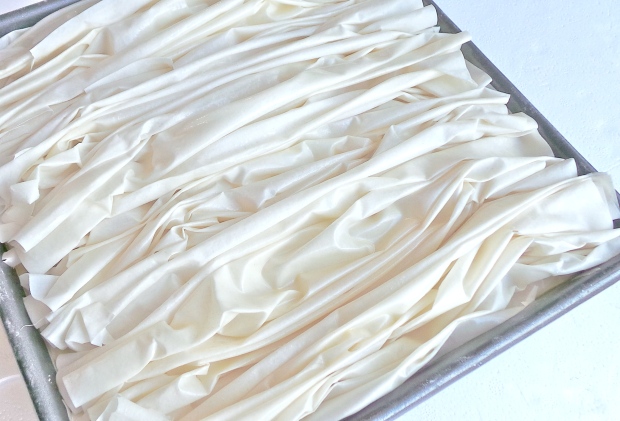
5: Butter 2 more sheets this time you will need to cut them to size so thatthey fit perfectly. Make fillo ruffles by gently making folds and gently 
scrunching then together and placing on top. Repeat the till the top is 
completely covered. You will need about 7 sheets or more. 

6: Bake for approximately 35 - 45 minutes or till the pastry is golden 
brown. 

Ive always served this dessert at room temperature dusted with icing sugar or you could try agave powder and just a little more cinnamon powder. if you would like to serve it hot then a nice scoop of vanilla ice-cream is     perfect.
20160512_095816

I hope you all enjoy my very own child hood favourite. 

20160512_095421

Note: 
tps = teaspoon
TBS = Tablespoon


Toasted Almond and Pecan Frangipani

A Dainty Dessert without the fuss…..”Sounds like my type of recipe”

“Toasted Almond and Pecan Frangipani”

1447156405544

Some of my best ever recipes might be considered fuss free but never lack all the delightful qualities of a great home bake.

With a crumb thats both moist and has a heavenly aromatic warmth that only roasted nuts can give. A crunchy crust which can only be described as….”Balance has been restored in the universe of baking”. If you are partial to pecans and almonds as I am, then Im thinking you will love this recipe.

Crunchy crust coating:

1 x 20cm round baking pan

10g room temperature unsalted butter                                                                                                                  40g flaked almonds                                                                                                                                                        2 Tablespoons caster sugar

Spread the butter all over the base and sides of the baking pan.

Spread the almonds and sugar around the edges and base and set aside.

1447155491139

For the Frangipani:                                 

75 g whole Almonds toasted                                                                                                                                       75 g whole Pecans toasted
140 g Caster sugar (optional use French Caster Sugar – CSR Sugars of the World)
3 eggs
115 g butter at room temperature
50 g Plain/All purpose flour                                                                                                                                         1 pinch of salt
1/4 teaspoon baking powder

Topping:                                                                                                                                                                      40g Flaked Almonds

Preheat oven to 170 ° C (fan forced).

In the bowl of your food processor fitted with the cutting blade place the toasted almonds, pecans and sugar pulse till the nuts are and even crumble.

Add eggs and butter and the pinch of salt pulse the food processor for 30 seconds.

Finally add the flour mixed and baking powder, pulse again till everything is well combined.

Pour the cake batter into the cake pan and sprinkle the 40g of flaked almonds evenly over the top of the batter. Bake for 30-35 minutes, till the cake is golden.

Let the cake cool completely before removing from the cake pan.

Dust with a little icing sugar and serve. 🙂

IMG_20151110_222447

1447155712668


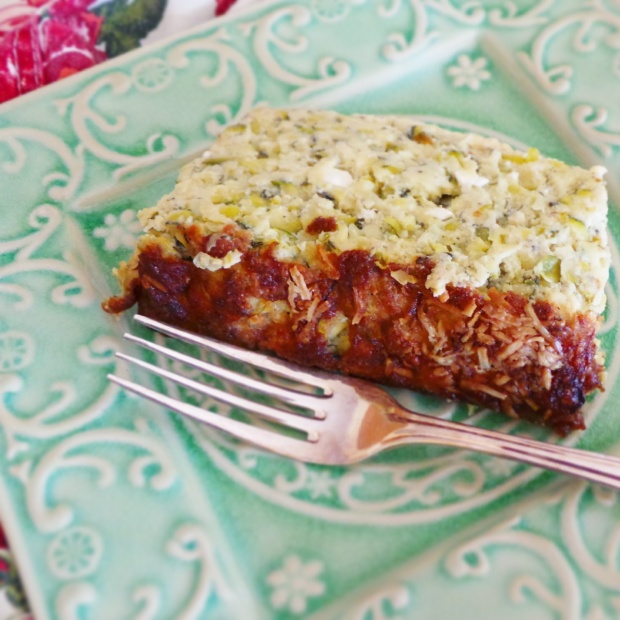
Greek – Zucchini and Fresh herb Feta Frittata

Zucchini and Fresh Herb Feta Frittata

IMG_20151105_080711

This is a dish that both my mother and grandmother both bake to perfection and even though for the sake of the recipe I have added measurements for the zucchini and the fresh herbs a little over or a little under will not alter it, it will alway taste as delicious as it should.

When zucchinis are in abundance and fresh herbs are plentiful then this bake may appear a few times as part of the dinner meal, for lunch or even breakfast.

Filling:

  • 4  Zucchini (medium sized) Grated
  • 1/4 cup Fresh chopped Mint
  • 1/4 cup Fresh chopped Dill
  • 1/4 cup Fresh chopped Parsley
  • 1 onion, finely grated
  • 3 Tablespoons olive oil
  • 3 egg yolks
  • 250g feta cheese, crumbed
  • 3 egg whites (whipped to stiff peak)
  •  1/2 teaspoon white pepper
  • Topping:
  • 1 cup parmesan cheese, grated

DIRECTIONS

  1. In a bowl mix together the grated zucchini and fresh herbs set aside.
  2. In a small fry pan add a tablespoon of olive oil and the grated onion, saute gently till the onions have softened and lightly caramelised. Add the onion to the zucchini and mix to combine.
  3. Pre-heat the oven to 170 degrees celsius.
  4. Beat the egg yolks and  olive oil together add the crumbled feta cheese, white pepper, mix into the zucchini mixture.
  5. Fold the whipped egg white into the zucchini mixture.
  6. Oil a large baking tin (approximately 20cm x 25cm) spread the mix evenly. Spread the grated cheese over the top.
  7. Bake for 35 – 45 minutes till the top of the bake is crisp and golden.
  8. Remove from the oven and allow to cool before serving.


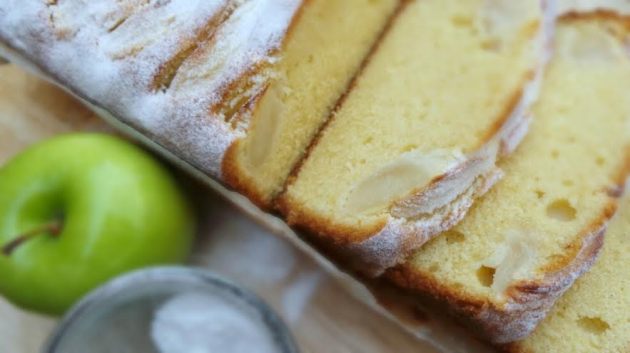
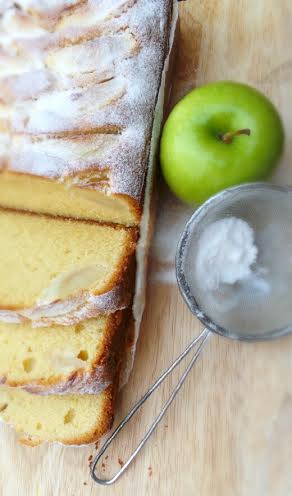
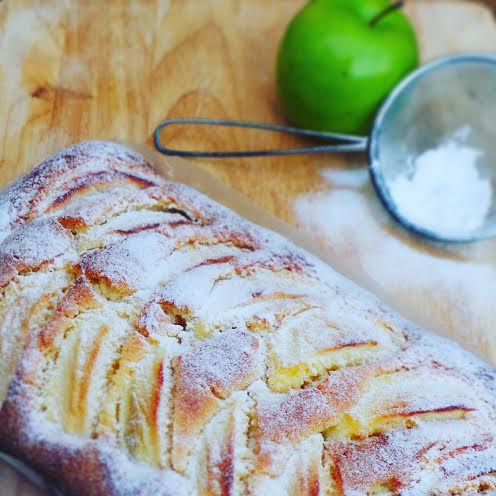
French Sugar – Apple and Almond Loaf


French Sugar – Apple and Almond Loaf

FAAC4

Ingredients:

190g soft butter

130 g French Caster sugar (White Beet Sugar – CSR Sugars of the World)
3 eggs
190 g Plain flour
1/2 Tablespoon baking powder
60g ground almonds
30g Sour Cream
1 teaspoon vanilla bean Paste

1 Large Granny Smith apple pealed with core removed and cut into 8 wedges.

Method: 

Preheat oven to 190 ° C.

Firstly peal and core the apple, cut into wedges squeeze some fresh lemon juice over the apple pieces and sprinkle with a little sugar. Place the coated apple pieces in a bowl and set aside for the moment.

Using a standard mixer with the paddle attachment, cream together butter and sugar till fluffy and pale in colour then begin adding the eggs one by one. Be sure that they are well combined before adding the next egg.

Add the sour cream and vanilla bean paste.

Sift together the flour, ground almonds and baking powder. Add to the butter and egg batter. Mix till all ingredients are well combined.

Place cake batter in cake tin lined with baking paper, place apple slices along the top of the cake batter and sprinkle with French caster sugar.

Bake for 10 minutes then lower the thermostat to 170 ° C for 25-30 minutes. Or until a wooden skewer can pierce through the centre of the cake and is clear of any wet batter when removed.

Allow the cake to cool in the cake tin then remove and allow to cool completely on a cooling rack.

Sprinkle the cake with icing sugar and serve.

FAAC5

FAAC7

 FAAC1


Sesame Seed Dinner Rolls

There is a true beauty to baking in general, yet nothing surpasses the aroma of freshly baked bread penetrating into every corner of your home. The aroma likened to a warm hug or a heartfelt smile from a loved one you have been longing to see. For myself its been the longing to walk past the village bakery in Greece to relive a moment that has lasted a life time.

Bread1

Now I know that you might be looking at these pictures thinking …..”she’s made rings, as well as rolls”, true I took the opportunity to make the Turkish “Simit” a bread ring that is heavily crusted with sesame seeds (which I was totally obsessed with eating at all hours of the day while in Turkey a few years ago).     I uses the same method of baking as the rolls. So be brave and try something different …ps they make the perfect edible napkin rings 🙂

Bread2

Sesame Seed Dinner Rolls

Ingredients:
1 Tbs milk powder
250ml water
40g Rice Bran Oil
40g Unsalted Butter melted
1 egg
1 teaspoon salt
2 teaspoons dry yeast
1 teaspoon sugar
500g Bakers flour

Honey Wash:
2 teaspoon honey
2 Tablespoons water

Topping: Sesame seeds

Method:
Place in a bowl the flour, milk powder, dry yeast, sugar and salt mix well to combine all. Add the water, oil, melted butter, egg and mix. Using a standard mixer with a dough hook attachment knead till the dough looks smooth and elastic – on medium speed for approximately 6-8 minutes.

Cover the dough with cling film  to prevent forming a skin and leave to rest about 15 -20 minutes.

Divide the dough into 60g portion sized pieces. Shape each into a ball and allow to rest again for a further 10 minutes. Take each individual dough ball and press with your hand to open the dough to form a circle about the size of a teacup saucer. Then roll back again to the dinner roll shape.

Dissolve the honey and water. Sprinkle the sesame seeds on a small baking tray or flat dish.

Brush the tops of each dinner roll with the honey wash then roll the wet side in the sesame seeds.

Place on baking sheet lined with greaseproof paper.

Allow the dough rolls a further 30 – 35 minutes to rise.

Preheated oven at least 15 minutes prior to use at 200 degrees Celsius. 

Just before baking, use a water filled spray bottle to spray a fine mist of water over all the dough rolls. Reduce the oven temperature at 170 degrees and bake the bread rolls until golden brown approximate baking time 12 – 18minute. (All depends how big you make to rolls)

Once baked place the rolls on cooling racks.

The only thing let to do is head to the fridge reach out for the butter, rip one of those freshly backed beauties apart and lay on the butter.

Pure Joy!

Bread3

Bread5


Milk Bread for the Home Baker

image001

Home made bread has to be one of the most satisfying foods. We eat bread morning noon and night as a snack or accompanying an elaborate dinner party or a simple Barbecue. Bread has always been the corner stone of a light or main meal. A staple that even when the pantry is bare bread was enough to sustain the hunger.

Some countries are ferociously possessive of the flour and the techniques they use to produce the perfect loaf. That distinctive aroma of a freshly baked Vienna or the sour rustic notes of a crusty heavy sour dough where the smell lingers long after the bread has been devoured by hungry workers or a famished family.

Bread is one thing everyone remembers from their childhood day. Growing up and purchasing a fresh bake from the local  bakery where the dough has been lovingly shaped and proved then baked to crispy perfection. As the baker hands you one of his prized possessions he instinctively taps the bottom of the loaf ensuring the distinctive hollow sound is heard, a mark that all is well or rather baked well just before the hand over is complete.

DSC01971

Although my recipe has been adapted for the domestic oven, never the less does the technique of making bread change.

Bread Dough

Makes 1 large Vienna or 2 Cobs or 12 dinner rolls

500g Bakers Flour

2 tsp Dry Instant yeast

1 tsp Caster Sugar

1 tsp Bread improver

1 Tbs Milk Powder

1 tsp Salt

1 Tbs Unsalted Butter (room temperature)

1 Tbs Rice Bran Oil

335ml Water (approximately)

METHOD 

  1. Add all the dry ingredients and using a standard mixer with the paddle attachment on slow speed mix all.
  2. Remove the paddle and now attach a dough hook. On low – medium speed add the butter and begin pouring the water into the flour mix. Add the first 300ml then if required add the rest you really need to feel the dough if its too sticky then naturally do not add any more water or if the dough feels and looks dry then add a few extra tablespoons of water at a time to get the wright consistency.
  3. Once the dough has come together, looks smooth in appearance and you are able to do the “Window test” with a small piece of dough, then we are ready for the next stage.
  4. Stop the mixer, remove the dough hook and cover the bowl with some plastic, and leave it to rest for 15 – 30 minutes.
  5. On a lightly floured surface and a little oil on your hands remove the dough from the bowl shape into the desired shapes making sure you flatten out any large air bubbles that may have formed, place the dough onto prepared pans or trays. If you are using loaf pans then fill the with dough to just over half full with dough.
  6. Allow the dough to rest for approximately  30 – 40 minutes in the baking trays or tins. I like to put them in the oven with a cup of boiling hot water in the oven just to create a little moisture in the air as it rests. Then when ready take the dough out put it aside while the oven is heating up.
  7. 15 – 20 minutes Before baking Pre- heat the oven up-to 230 Degrees Celsius if your oven permits.
  8. Place a deep dish grill tray on any other shelf where it will not interfere with the rising dough. Place the dough on a rack in the centre of the oven and add one cup of hot water from the tap to the grill tray then quickly close the oven door to trap in the steam.
  9. Bake the dough for approximately 30 – 35 minute to a dark golden brown colour.
  10. Remove the bread loaf from the pan and allow to cool completely on a cooling rack before slicing.

Golden Gaytime Cake – Layered and Perfectly Naked

Recipe makes 1 (6 inch) layered Naked Cake

Serves 8 – 12

Equipment

1 (7 inch) Cake Board

1 (6inch) Cake Ring

1 Strip of Acetate approximately 40cm length and approximately 13 – 14cm wide

Assemble Cake Instructions

  1. Place a piece of baking paper on your work bench, invert the cake onto it and remove the parchment from the cake.
  2. Use the cake ring to cut out 2 complete cake circles which will be the top two layers of your cake and the remaining cake should be enough to cut two circle halves and scraps to fill in any gaps for 1 bottom layer.
  3. On a baking tray place the cake base, clean the cake ring and place this in the centre of the cake board. Line the inside of the cake ring with the acetate. Now we are almost ready.
  4. Place the two halves and any cake scraps you require to fill the first layer (base) to make a flat even layer.
  5. Warm the Cho-Malt Fudge Sauce spread, one fifth of the Choc-Malt Sauce over the base. (The sauce is so much easier to spread when its warmed)
  6. Spread half the quantity of Caramel Creme then sprinkle with the (small particle) Malt Crumble gently push them into the Caramel Creme to fix them in place.
  7. Spread another layer of Choc-Malt Fudge Sauce. Repeat the process for the next cake layer.
  8. Place the last layer on top spread the last amount of Choc-Malt Fudge Sauce and cover with the Chocolate Butter Cream. Garnish the top with the remaining large Malt Crumble Biscuit pieces.
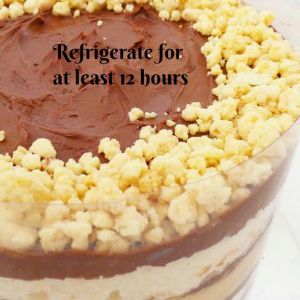
  9. Place the cake in the fridge and allow to set for a minimum of 12 hours.
  10. Use a hot knife to slice and serve.


GGC9


Vanilla Bean Cake

makes 1 (12 by 12 inch) square cake

55g Unsalted Butter (room temperature)

210g Caster Sugar

60g Rice Bran Oil

2 Eggs

1 Egg yolk

1 tsp vanilla Bean Paste

110g Buttermilk

185g Plain Flour

1 tsp baking Powder

1/2 tsp Salt

  1. Pre-Heat the oven to 170 Degrees Celsius
  2. Sift the flour, baking powder and salt and set aside.
  3. Cream the butter and sugar together then add the rice bran oil, vanilla bean paste and eggs one at a time. Add the extra egg yolk. Cream till pale and fluffy.
  4. Alternate the addition of the flour and the buttermilk till both have been combined.
  5. Pour into a square baking tin lined with baking paper spread out the batter evenly and bake for approximately 20 – 25 minutes.
  6. Allow to cool completely.

Caramel Creme

280g Milk

75g Cream

100g Caramel

1tsp Vanilla Bean

25g Cornflour

50g Caster Sugar

2g Salt

3 Egg Yolks

2tsp Maple Extract

4g Gelatin (2 Sheets) or  (2 teaspoons Gelatin Powder – Bloomed)

————————————————————————–

40g Cold Butter

————————————————————————–

160g Cream

  1. Pour the milk, cream and caramel into a sauce pan and bring to a boil.
  2. Combine the cornflour, sugar, salt and mix. Add the egg yolks and whisk till the sugar has dissolved.
  3. While whisking pour the boiling milk over the egg yolk mixture a little at a time till the egg mix is tempered.
  4. Pour the entire mix back into the pot and whisk continuously till the custard creme thickens and has reached a boil. Remove from heat and add the maple extract and the cold butter. Whisk continuously till the butter has combined and the Caramel Creme is smooth.  If the custard has any lumps pass it through a strainer.
  5. Pour into a heat proof bowl cover the caramel custard with plastic wrap, press the cling film directly onto the custard to stop a skin from forming while it cools completely.
  6. Once the caramel creme is cold. Whip the fresh cream to soft peak. Place the caramel creme into the bowl of a standard mixer and re-whip till smooth. Fold the soft whip cream into the caramel creme.

Malt Crumble Biscuit

30g Low Fat Milk Powder

40g Flour

12g Cornflour

40g Malt Powder

25g Caster Sugar

2g Salt

55g Butter (Melted)

————————————————————————–

60g Malt Powder

90g White Chocolate (Melted)

  1. pre-Heat the oven to 170 Degrees Celsius
  2. Place the powdered milk, flour, cornflour, malt powder, sugar and salt into the bowl of a standard mixer with the paddle attachment. Mix all till well combined then add the butter mix till a fine crumble is formed. Pour the crumble onto a baking sheet lined with baking paper and bake for 20 minutes. The crumble should be golden and the buttery aroma should have filled the room.
  3. Allow the crumble to cool completely. Sprinkle the malt powder over the crumble and break up any large pieces of biscuit.
  4. Melt the white chocolate and pour over the crumble, using your fingers enrobe the crumble with the white chocolate. You will notice some large crumble pieces and small pieces have formed. Allow the crumble to cool and set aside about half a cup full of the larger crumble pieces aside for garnish and the rest for between the cake layers (make sure these are all about the size of rice grains).

Chocolate Buttercream

115g Unsalted Butter (room temperature)

80g Icing Sugar

1g Salt

2Tbs Cocoa Powder

————————————————————————–

55g Milk (Cold)

  1. Using a standard mixer with the paddle attachment cream the butter till pale in colour then add the icing sugar, salt,and cocoa powder.
  2. Cream until the buttercream is light, smooth and fluffy while whipping add the cold milk. (Don’t forget to scrape down the sides).

Milk Chocolate Malt Sauce

60g Milk Chocolate

80g Malt Powder

1g Salt

—————————————————————————-

200g Glucose

50g Caster Sugar

150g Cream

  1. Combine the milk chocolate, malt powder and salt in a heat proof bowl and set aside.
  2. In a saucepan combine the glucose, sugar and cream, bring to the boil remove from heat and pour over the milk chocolate and malt mix.
  3. After a few minutes slowly whisk the chocolate malt sauce until the mixture is smooth and silky. Pour the sauce in a food processor and blend till the sauce is completely smooth.

——————————————————————————–

IMG_20151024_184241


Coconut Blossom Caramel Sauce


CSR SUGAR Australia has released a beautiful range of traditionally farmed sugars. Each one with its deep rich and delicate notes of caramel, butterscotch, toffee and treacle. The unique molasses content in each gives the unrefined sugar its golden colour and decadent flavour.

So I thought I’d put it to the test!

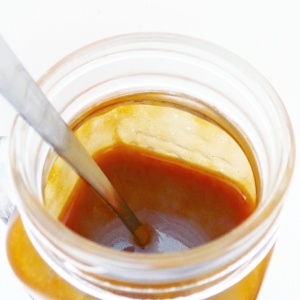
I adore this recipe it can be use in cakes and buttercreams or warmed and drizzled over ice cream, puddings or eaten straight up with your favourite spoon or simply smear over toast.

IMG_20151027_104225

Be creative Ive made this recipe with all of the different sugars and each time its been a delicious result. So make a caramel sauce to suit your personality and your taste buds.

France – French Caster Sugar

Colombia – Panela Sugar

Sri Lanka – Rapadura Sugar

Indonesia – Coconut Blossom Sugar

Australia – Muscovado Sugar

IMG_20151027_103919

COCONUT BLOSSOM CARAMEL SAUCE

Makes about 1  1/2 cups

UTENSILS

1 x 2 Liter Heavy base saucepan

1 Candy Thermometer

1 Whisk

1 Heatproof jar with lid to store your caramel

INGREDIENTS

125g Cream

60g  French Caster Sugar

60g Coconut Blossom Sugar

60g Unsalted Butter

45g Glucose

1/4 tsp Salt

——————————–

1/2 tsp Vanilla Bean Paste

125g Cream

METHOD

Bring the 125g Cream, sugar, butter, glucose and salt into the heavy base saucepan uncovered over medium to high heat. Once the sugar has dissolved  whisk the mixture just a few times to combine and continue to boil till the mixture reaches 120 Degrees Celsius take off heat.

Add the vanilla and cream in a thin stream while whisking constantly till well combined. Place back on the heat and boil again. Remove from heat straight away. Allow to cool for a moment.

Pour the caramel into a heat proof container.

Leave to cool then cover it tightly and store in refrigerator.

Re-heat to use.

Don’t forget this caramel sauce makes a great gift too!

Enjoy 🙂

“Kiwi Fruit and Banana Booster”

11148757_525090127644725_3110895673717026884_n

Ok now don’t knock it till you try it.

“Kiwi Fruit and Banana Booster” 

1small Banana
1 Kiwi Fruit, (Green or Gold) plea and stem removed
1/2 cup fresh Spinach
1cm piece of fresh ginger 
Zest of half a lemon
1/2 Tablespoon Honey
1 teaspoon white Chia Seeds
1 cup cold Almond Milk

Method
Add all the ingredients to a blender and blend till smooth. 

Enjoy!

11825021_525093997644338_1265655309255398468_n

Strawberry Fields

11224382_525907130896358_3475184211368373573_n

“Strawberry Fields” 

Makes one serve, but feel free to share!
1 cup Strawberries (washed and stems removed)
1 cup Almond Milk
1 Tablespoon Honey
1 pinch Cinnamon
1 Tablespoon Almond Butter (or Peanut Butter)

Method

Place all the ingredients in a blender and blend till smooth.
Enjoy!

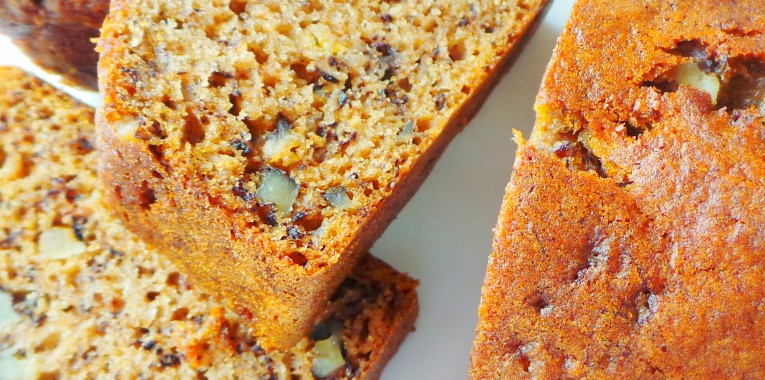
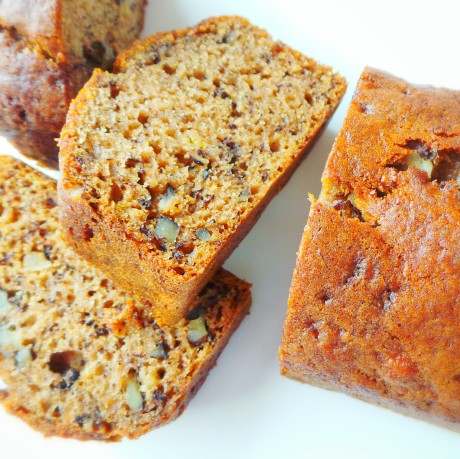
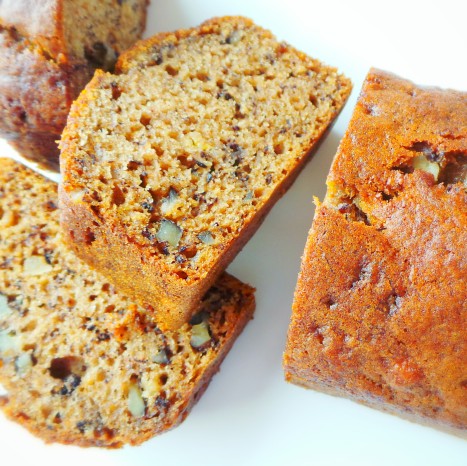
My Best Ever “Banana and Walnut Cake”

20150610_105223~2

20150610_102931~2

20150610_104312~2

Banana and Walnut Cake

85g butter (room temperature)

150g Sri Lankan Rapadura Sugar

———————————

1 egg

———————————

200g ripe bananas, mashed (approximately 2 ripe bananas)

———————————

125g natural Greek yoghurt

30ml rice bran oil

———————————

220g flour

3/4 teaspoon baking powder

1/2 teaspoon bicarbonate powder

1/4 teaspoon salt

———————————

60g walnuts, chopped

1: Preheat oven to 180°C, or if it’s fan-forced, 170°C.

2: Prepare a loaf pan by lining it with baking paper. Set aside for the moment.

3: Combine the butter and sugar in a stand mixer fitted with the paddle attachment. Beat for 3 to 4 minutes then add the egg. Don’t forget to scrap down the sides.

4: Mix together the mashed banana, yoghurt and oil. With the mixer on low speed, add to the batter. Beat for a further 4 to 6 minutes or until the batter is light and fluffy.

5: Still on low speed, add the dry ingredients to the batter and then the chopped walnuts. Pour the batter into the loaf pan. Give the bottom of the pan a tap to even out the batter and release any large air bubbles. Bake on the middle shelf of the oven for 25 to 35 minutes or until a skewer inserted in the middle comes out clean.

6: Leave on a cooling rack for 5 to 10 minutes before removing from the pan.

Make like Maria and try these sugars in your favourite recipes. Discover the new Sugars of the World range in Coles, Woolworths and Independent retailers nationally. www.sugarsoftheworld.com

Enjoy!

20150610_105924~2

20150610_104312~2

The Perfect Little Princess – Cake Expo Melbourne

11081316_465921696894902_2411812390630633383_n

Swedish Princess Cake.

It’s perfect for a special occasion. It is a delicate cake, and looks best with simple decorations.

10982079_465921710228234_1111205887646018185_n 20141103_131138~2

Ingredients:

For the crème patissière:

75g egg yolks (approximately 3 small egg yolks)
100g caster sugar
1 vanilla pod or 1 teaspoon Vanilla Bean Paste
500ml whole milk
50g cornflour                                                                                                                          45g Butter (Room Temperature)

~

For the Jaconde sponge:
3 medium whole eggs
125g icing sugar
125g almond meal (sifted)
3 egg whites
15g caster sugar
40g plain flour

~

For the filling:
2 tbsp Good Quality Raspberry Jam
Punnet of raspberries (approximately 150g)

~

For the decoration:
400g marzipan
400g white Fondant
Pink food colour (or other colour if you prefer)

Equipment:

Two baking trays with a minimum width of 30cm
15cm half sphere mould
15cm round pastry cutter
Plastic piping bag
6 inch round cake card board

8 inch round cake board
Small non-stick rolling pin
Mould for flower decorations or you can try making a flower by hand
Scalped Edge Cutter
Egg carton or plastic paint palette with wells
Leaf Mould Veiner                                                                                                                                                                  Large Flower Petal Cutter
Plain round 2.5cm pastry cutter

Method:

Preheat the oven to 190°C

Line two baking trays with baking paper.

To make the crème patissière –
Whisk the egg yolks with the caster sugar in a mixing bowl, then add the cornflour and stir to combine. Place the milk, vanilla seeds and scraped vanilla pod in a saucepan and bring to a bare simmer. Pour about a quarter of the hot milk onto the egg yolk mixture, immediately stirring until smooth.

Add the egg yolk and milk mixture to the pan with the remaining hot milk stir well till combined and smooth. Continue cooking until the mixture thickens and bubbles in the centre, stirring well to make sure the crème patissière does not burn on the base of the pan. Taste the crème patissière to check it is cooked; it should not taste floury. The texture should be smooth and thick.

Transfer to a bowl or tray. To prevent a skin from forming, cover tightly with cling film, pressing down firmly to make sure there are no air pockets. Allow to cool to room temperature place back into a clean mixer bowl with a paddle attachment and on medium speed begin adding the room temperature butter in small amounts beat until the butter is well incorporated and the custard is smooth, chill until further use.

To make the Jaconde sponge –
Beat the whole eggs and icing sugar together until pale and fluffy. Sift together the flour and ground almonds, then gently fold into the egg mixture using a spatula.

In a clean dry bowl, whisk the egg whites with the sugar until they reach soft peaks. Fold the meringue mixture into the batter.

Divide the batter evenly between the two prepared baking trays and level the surface using a palette knife or the back of a spoon.

Bake for 8–10 minutes on a low shelf, depending on your oven. The sponge is cooked when the sides are beginning to shrink away from the edges of the tin and the top is lightly golden brown and springs back to the touch.
Allow to cool outside of the oven but leave the sponges in the baking trays. Once cool, cover with cling film to prevent the sponge sheets from drying out.
20141103_113822~2

To assemble the cake –
Place the sphere mould on top of a small round cake tin to hold it steady. Line the inside of the mould with clingfilm, overlapping the edges.

Cut out a 30cm round from one of the sponge sheets. Use it to line the inside of the sphere mould, leaving a small overlap around the outside edge. Trim off any excess using a pair of kitchen scissors.

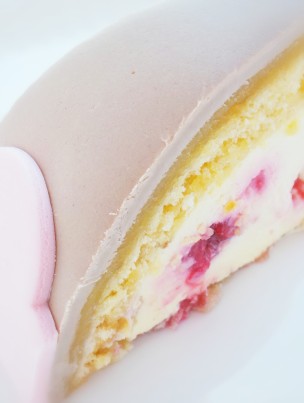
Fill a piping bag with the custard filling. Snip an inch off the tip and pipe a thick layer into the bottom of the cake mould, then place six fresh raspberries evenly over the custard. Pipe another layer of buttercream on top. Continue adding layers of buttercream and fresh raspberries until you have almost reached the top edge of the mould. Level off the last layer of cusard using a palette knife.

Cut out two 15cm rounds from the remaining sponge sheet using a pastry cutter. Sandwich the two rounds of sponge together with a thin layer of raspberry jam. Place the two sponge rounds on top of the buttercream-filled mould. Place a layer of clingfilm over the top then place the 6 inch cake board on top. Trim any excess sponge from around the edges of the mould. Cover all with another layer of cling film over the top tightly. Chill for at least 4–6 hours or preferably overnight.

To make the decoration –
While your cake is setting in the fridge, make the flower decorations.

For the pink-coloured fondant, mix 400g white fondant with few drops of pink food paste colour to blend together a very pale shade. To prevent it from drying out, keep the sugar paste wrapped in cling film until use.

Make 3–4 flowers in different shades of pink fondant with sugar paste hardener added so that the flowers will air dry quicker and hold their shape.
20141103_131203~2

To decorate
Once the cake has set, remove it from the fridge and turn it out on the 8 inch cake board. Remove the mould and the cling film.

On a surface dusted with icing sugar, roll the marzipan out to a thickness 3–4mm. It must be large enough to cover the dome. Using a rolling pin, lift the rolled marzipan and lay it over the dome cake. Smooth the marzipan down the sides of the dome using your fingers. Tuck the edges down and trim away any excess marzipan using a kitchen knife.

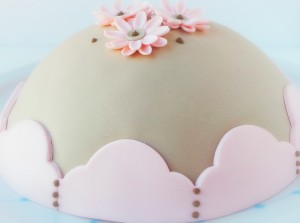
Roll out the pink sugar fondant and place over the marzipan the same way. Trim away any excess sugar paste as before.

Cut a 2.5cm wide strip or scalloped edge that is long enough to go all around the base of the dome to create a swag border.

To finish, placed a flower on top of the dome. Be creative its up to you but keep it simple!

11081316_465921696894902_2411812390630633383_n

This cake has a shelf life of 3 days when stored in the fridge, however the decoration may become soft and sticky in cold humid conditions. Therefore, I recommend making the cake no more than 2 days in advance of serving and consuming it.

within 1 day.

This recipe was inspired by the wonderful Dome Cake by Peggy Porschen.

Get ready to “RUM BALL”!

10868071_10152617681882709_4806372427767096313_n


This recipe came about one Chiristmas many years ago when it was almost customary to give a Christmas cake as a gift to celebrate the festive season. Overwhelmed with the rich fruity and spice aroma of these gorgeous home baked fruit cakes and having been given a generous quantity…….”Well the truth be said there is only so much fruit cake you can eat”!

So the mother of invention had to intervine to produce a new Christmas tradition. Inspired to use what I had, which at the time included Chocolate and all those fruit cakes, and no baking!

1469978_10152617681957709_2159612484320561763_n

Thus the Rum Ball has now become a firm inclusion to the Christmas desserts list in my household, not to mention they make an excelent gift. One year I made them all look like minature puddings diping them firstly into the dark chocolate and then using white chocolate as the custard and a small piece of red glace cherry on top to finish. Christmas after Christmas the little rum balls took on a more refined and simplistic look perhaps the K.I.S.S (Keep it simple stupid) had finally dawned apon me. I was confronted by the subtle hints from friends and family that had enjoyed them from a previous Christmas that they loved receiving them as gifts. What a great idea!

Edible glitter transformed a little bit of Christmas into a sparkling delight for the eyes, and when all boxed, they sparkle and glisten ……”let the Christmas celebrations begin”.

Rum Ball Truffles
 Quick and Easy

Rum Balls

Ingredients:

1  x 800g Dark Chocolate Fruit Cake

1  x 480g Double Chocolate Buttercake

30ml Freshly brewed Espresso Coffee

1-2 Tablespoons Rum Extract (this is optional)

2 x 375 pkts of Dark Chocolate Melts

You will need:

Food processor (if you don’t have a Food Processor do not worry you can use your hands and a large bowl)

Small or Large Icecream Scoop (I say either, depending on how big you want to make them)

Baking Tray lined with Baking Paper (to set the Rum Balls on)

Heat proof bowl to melt the chocolate in (use the microwave using short bursts (30second) of heat, mix heat again and mix till all the chocolate has melted)

Method:

1. Crumble the fruit cake and the chocolate cake into the bowl of the food processor and pulse a few times till the cakes have become small crumbles.

2. Add the Rum essence or if you would like the adult version, add a tablespoon or two of the real alcoholic version. Add half the coffee at first, and pulse all. If the mix looks a little dry, add a little more coffee till it all comes together.

3. Scoop equal amounts of the cake mix onto the baking paper lined tray using the icecream scoop.

4. Gently roll the individual balls till nice and smooth, placing them back onto the tray and then place them into the refrigerator to set.

5. Meanwhile melt the chocolate (I use dark chocolate because I like it, but there is no reason why you shouldnt use Milk or White Chocolate…..it’s time for indulgence after all!)

6. Gently dip the balls into the melted chocolate and then ease them onto the baking paper again. I use a couple of forks to help me out with this process (at this stage you might like a second tray prepared for this purpose) as the rum ball mix was in the fridge you will find that they will set quickly.

7. Once the chocolate has set, I’ve used a little brush to add some red edible glitter. Now they are ready, well after you have enjoyed one or two. 🙂

Enjoy my ultimate Christmas Treat!


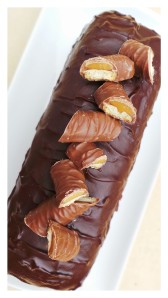
Salted Caramel TWIX Cake…for the busy baker.

20141001_160942~220141001_160932~2


“Salted Caramel TWIX Cake” ……..this is for the busy baker!

Equipment you will need 1 x Loaf tin approximately 26cm x 8cm x 6cm.
Cooling rack
Baking tray
Plastic food wrap
Hair Dryer

10556233_359694737517599_5242970478030278216_n

Ingredients

1 x Vanilla / Butter Cake

Pre heat the oven to 180 Degrees.

Prepare your tin by greasing with cooking oil spray. Line the tin with baking paper.

Prepare the cake mix as directed and bake as recommended or till golden and baked through.

Chocolate Shortbread

For the Chocolate Short bread (This will be the biscuit base of the cake)

300g 00 Flour
30g Cacao Powder
130g Icing Sugar
150g Unsalted Butter
3 Egg Yolks

Place the Flour, Cacao, Icing Sugar, and cold unsalted butter in the bowl of a food processor and pulse till all the ingredients have combined. Add the egg yolks and pulse again till it all comes together, push the dough together (careful not to over work the dough). Make a ball flatten it slightly and wrap the dough with plastic wrap, rest in the fridge for 15- 30 minutes.

On a lightly floured surface roll out the dough to 5 millimetre thickness cut a rectangle the size of the widest part of your loaf tin pierce holes over the dough with a fork. Bake in a preheated oven at 180 Degrees for 12 minutes. Remove from the oven and allow to cool completely on the baking tray.

Caramel
1 x 300g Salted Caramel Dessert Sauce ( the brand I used is Safeway Gold Salted Caramel Dessert Sauce)
50g Milk Chocolate Melts

Place the salted caramel dessert sauce in a saucepan and heat through while constantly stirring.

Remove form heat as soon as it comes to the boil. Add the milk chocolate stir all till well combined till you have a smooth glossy caramel. Set aside to cool slightly.

To prepare the mould / channel (to form the dome shape which will be the top of the cake) for the caramel use the same loaf tin. Place cling wrap over the top of the loaf tin and allow it to evenly sink down creating a channel. Secure all four sides of the plastic to the loaf tin and pour the semi cooled caramel into the channel then set aside.

Chocolate Ganache

450g Milk Chocolate Melts
220g Cream

14g Glucose
60g Unsalted Butter

Place the chocolate in a heat proof bowl.

Bring the cream, butter and glucose to the boil and pour it over the milk chocolate pieces.

After 5 minutes use a whisk to stir the chocolate and cream together till it is smooth and glossy.

10448198_359694787517594_4875242217414039070_n

Assemble the cake

Smear a layer of caramel on to the biscuit base.

Trim your cooled butter cake so that the top of the cake will now sit flat on the rectangle biscuit base.

Place the narrow side of the butter cake on to the caramel. Cover with plastic. Place the cake into the freezer for about 30 – 45 minutes.

Remove the cake from the freezer and carefully flip it over on to a cooling rack, the caramel will set frozen, peal the plastic off leaving the cake with a caramel dome on top.

Place a baking tray under the cooling rack and pour over the chocolate ganache. The cooling rack will allow the excess ganache to drip through leaving a smooth coating.
Technical Trick

To get the cake looking like a TWIX Bar use your hair dryer on a cool setting to blow air over the top of the ganache this will create the rippled effect.

Chop some TWIX bars and use them for decoration on top.


Aromatic Braised Beef Pie

S_BraisedBeef


71857_212338778919863_1764402329_n

Aromatic Braised Beef Pie
Ingredients
For the filling
2 tablespoons olive oil
1.5kg gravy beef, roughly chopped
salt and pepper
300g speck, rind removed and cut into thick strips
1 brown onion, diced
1 garlic clove, crushed
125ml sherry
125ml port
250ml liquid beef stock
1 cup broad beans, peeled (use frozen if fresh unavailable)
1 herb bouquet consisting of 8 parsley sprigs, 1 large bay leaf, 3 sprigs of thyme, 2 whole cloves or allspice berries, 1 strip orange peel, wrapped and tied in cheesecloth
1 tablespoon butter
2 tablespoons plain flour
250g Swiss brown mushrooms, sliced

For the pastry
2½ cups plain flour, sifted
¼ teaspoon baking powder
¼ teaspoon bicarbonate of soda
300g butter, chilled and diced
200ml sour cream
1 free-range egg yolk and 1 tablespoon milk, beaten, for the egg wash

DSC02018DSC03665DSC03667

To serve

2–3 teaspoons sesame seeds
Utensils
25cm pie dish
Serves 8–10

Preparation Method

Heat the oil in a pressure cooker pan. Season the chopped beef with salt and pepper, then add to the pan with the speck, onion and garlic. Sauté for 5 minutes. Add the sherry, port, beef stock, broad beans and herb bouquet. Cook in the pressure cooker for approximately 25 minutes. Remove the herb bouquet and discard.

Place the butter in a separate pan, add the flour and cook it through (approximately 3 minutes). Begin adding some of the beef sauce from the pressure cooker, a little at a time, to form a rich, thick sauce. Add the beef and vegetable mixture and the mushrooms.

Simmer for a further 5 minutes, then remove from the heat. Allow to cool completely in the fridge.

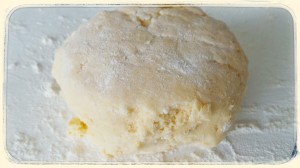
Place the flour, baking powder, bicarbonate of soda and butter into a food processor bowl and process until the mixture resembles breadcrumbs. Add the sour cream through the feed tube and process until combined, adding a little water if necessary. Place the dough onto a floured board and knead lightly until smooth. Cut off one-third of the pastry and roll into a ball. Shape the remaining pastry into another ball. Wrap both balls then flatter out slightly wrap in cling wrap and rest the pastry for 20 minutes in the fridge.
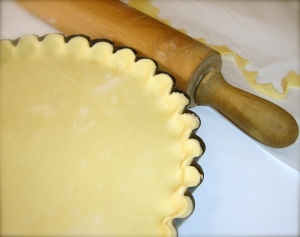
Roll out the larger pastry ball. Line the pie tin with the pastry and place back in the fridge to rest. (A hint for rolling out pastry: spray your worktop with oil. Place a large piece of cling wrap on top and roll the pastry out onto it. This will make it easier to pick up.) Roll out the smaller piece of pastry onto baking paper, making it just a little wider to fit the top of the pie and allowing for enough pastry to be crimped around the edge. Place on a tray, cover with cling wrap and rest in the fridge until the filling is cold.
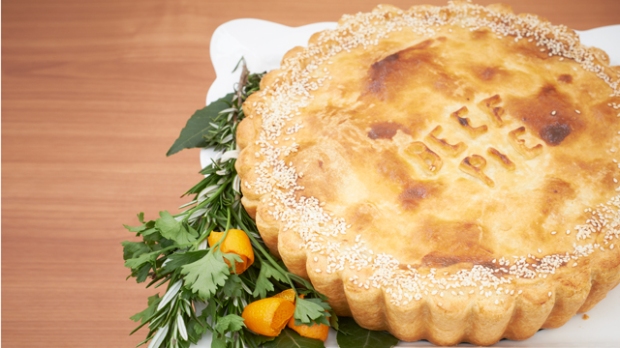
Preheat the oven to 190°C. Fill the pie case with the completely cold beef mixture. Top with the prepared lid. Crimp the edges. Use cookie cutters to cut shapes from any remaining pieces of pastry and decorate the lid. Make a few slits with a knife for the steam to escape. Brush the top of the pie with egg wash. Sprinkle the crimped edges with a generous amount of sesame seeds. Bake for 40—45 minutes or until golden brown. Allow to cool slightly before removing from the dish and serving.

20130713_185117


Zucchini, Feta and Spinach Muffins

20140818_171821~2

There are a few recipes that can remind me of a time and a place and these Zucchini Muffins do exactly that!

Many of my childhood memories are also tied to the smell of fresh herbs, stories from grand parents and memories of traveling, music and family both near and far. When I look at the cuisine that I have grown up with I cant help but think how fortunate I have been.

Versions of this recipe mostly appear in Middle Eastern recipe books as fritters and although my grandmother made them that way as well, I think she would have been happy with my muffin version too. Its less time consuming without losing any of the taste.

20140818_171639~2

INGREDIENTS
Zucchini, Feta, and Spinach Muffins:

2 medium zucchini, grated

200g Frozen Spinach, thawed

½ cup feta cheese, crumbled

2 Tablespoon fresh dill (chopped)

2 Tablespoon fresh Mint (chopped)

3 large eggs, lightly beaten

2 Spring onions sliced fine

1 teaspoon garlic, minced

½ cup Self Raising Flour

Salt and black pepper, to taste

3 Tablespoons Olive oil (plus a little extra for the cupcake Pan)

Method:

Preheat the oven 180 Degrees

Place the grated zucchini and spinach in a fine mesh strainer over a bowl. Sprinkle with a little salt and let sit for 10-15 minutes. Then, wring all of the liquid and discard. Place the grated zucchini and spinach in a large bowl.

Combine the zucchini, spinach, feta, herbs, eggs, spring onions, garlic and oil. Stir to mix well.

Sprinkle in the flour and fold through until it all is incorporated and holding together.

Using a nonstick cupcake pan, add ½ teaspoon of olive oil to the base of each cupcake section and divide the batter between the 12 spots on the cupcake pan.

Bake for approximately 25 minutes.

Note: For a Gluten Free option use Gluten Free SR Flour 🙂

20140818_171756~2

Galettes with Ham and Egg (galettes jambon oeuf)

Image

Galettes with Egg ( galettes jambon oeuf )

Faced with the dilemma of what to do with the leftover ham from Christmas and always looking for new ways to present Ham & Eggs at breakfast, brunch or for light lunch! Ive made muffins, toasted sandwiches,  Ive scrambled, poached and fried I even made a mini quiche….but what next?

“My little Paris Kitchen” had the answer I’d been looking for, I watched an episode where a lovely crape was being made at an out door growers market. The galette was filled with either sweet or savoury fillings. Totally intrigued, I embarked on whipping up a batch. Now you can make these with Buckwheat flour only (as long as you make the batter the day before you need to use it) but at 6.00am in the morning I could only work with what I had in the pantry Spelt Flour and the tiniest amount of Buckwheat flour.   

NOTE:

*The batter itself is thin and runny so don’t worry, we are so familiar with the thick batter thats needed for pancakes, galettes/ crepes are quite the opposite.

*You do need to work fast spreading the galette around the base of the hot pan. 
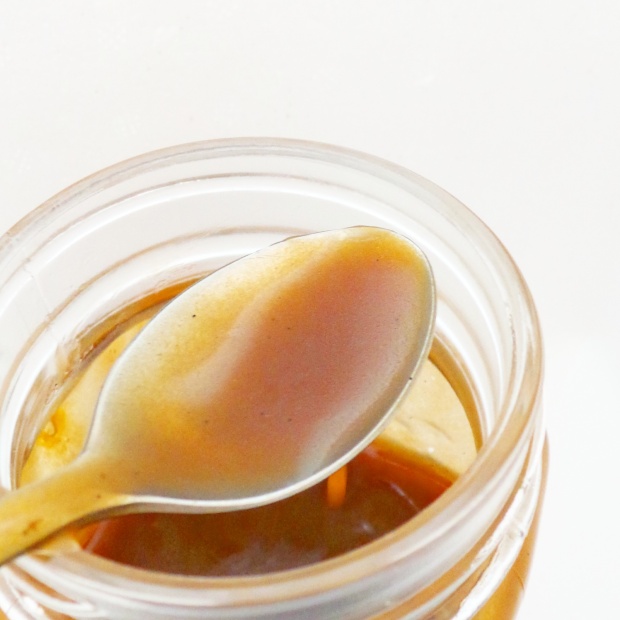
*If you pour to much batter into the pan don’t stress, cover the pan with batter and pour the excess out (into the bowl as you will use it to make the next crepe) don’t through it away!  

Ingredients

  • 25g butter, softened
  • 4 eggs
  • 4 slices ham (shredded)
  • 50g shredded cheese

Galette batter

  • 100g Spelt flour
  • 25g Buckwheat Flour
  • pinch of salt
  • 325 ml water

Method

Batter: Place flour, salt and the water in a large mixing bowl. Whisk batter until a smooth batter is formed similar to cream. Rest at room temperature for 1 hours.
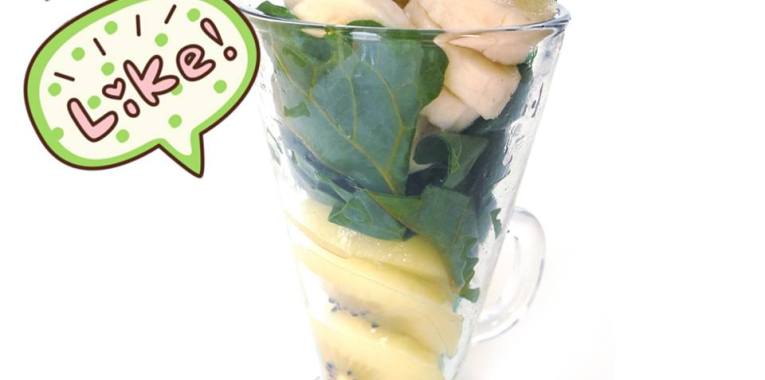
Heat a large crepe pan or frypan over high heat. Brush with a little butter. Pour in just enough batter to cover the pan, and rotate quickly using a circular motion to create a thin galette. When the edges of the crepe begin to peal away from the edge flip the crepe over.

Reduce heat to medium and crack an egg into pan, then spread the egg white across the surface of the galette. Top with a piece of ham, and scatter evenly with cheese. Cook for 2 minutes.

Fold the four edges towards the middle of the galette, making an envelope shape. Transfer to a serving platter. Brush with extra butter and serve.

Repeat with remaining batter, eggs and ham.

Enjoy

Artful is the new Rustic!

If the thought of a recipe described as RUSTIC sends shivers down your spine consider this!

“Artful is the new Rustic!

20140429_124020~2

Bread can be described as wholesome, earthy, crusty and rustic. Countries live and breath by the bread they make and have further developed a measure of quality by which a baker is referred to as, most popular being “Artisan Bread” or “Artisan Bakers”!

Why is it that a recipe handed down from Great Grand-mother to granddaughter not warrant the same respect , the feeling of deep admiration for a carefully crafted recipe measured not by grams but handfuls and the feel of the dough being carefully nurtured through every step.

“Don’t get me wrong I love the careful precision and craftsmanship produced in modern patisserie”

My point is we need to recognise that there is true art to be seen, valued and admired if only we looked closer with a child like wonder and used our sense of smell and our curiosity to enjoy the amazing baked spectacle that has been crafted together to produced a canvas of colour and long lasting memories.For all the recipes handed down for us to enjoy and to all the  “Artful Bakers”

” THANK YOU”

Pastry
Pastry
Home made Apricot Jam
Mixed Sultanas, Currants, Orange Peal
Mixed Sultanas, Currants, Orange Peal & Mixed Spices
20140429_120029~2
Egg wash and a sprinkle of Demerara Sugar

Ingredients:

160g Self-Raising Flour

2 Tablespoons Icing sugar

1 Tablespoon Custard Powder

100g Butter – Unsalted

1 Egg

65g Light Sour Cream

Filling:

1 cup mixed dry fruit (Sultana, Currant, Mixed Peal)

Apricot Jam (optional Raspberry is lovely too!)

Cinnamon Sugar (optional)


Egg-Wash:

1 Egg yolk

1/2 Tablespoon Milk

You will Need:

1 Baking sheet lined with baking paper

1 pastry brush

Rolling Pin

Method:

Pre-heat oven 180 Degrees

1: In a food processor add Self-Raising Flour, Icing sugar, Custard Powder and Butter process until the mixture resembles breadcrumbs. If you don’t have a food processor rub the ingredients together using your fingertips.

2: Add the egg and sourcream, bring the mixture together to form a dough ball. Do not over work the pastry.

3: On a floured surface use a rolling pin to roll out the pastry 4 – 5 mm thickness.

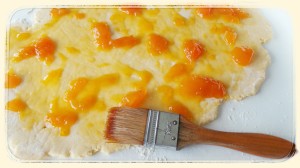
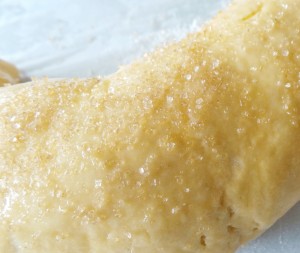
4: Brush the apricot jam over the pastry surface, then sprinkle with cinnamon sugar and lastly sprinkle over the mixed fruit. Gently roll the pastry. Place it on the baking tray brush with the egg wash and sprinkle the demerara sugar on top.


4: Bake till golden 25 – 30 minutes.

I hope you and your family enjoy this “Artful bake” 🙂

Happy Baking


Episode 7: The Great Australian Bake Off – Pastry and a little Gluten free


Signature Bake Challenge was all about  Gluten Free. 

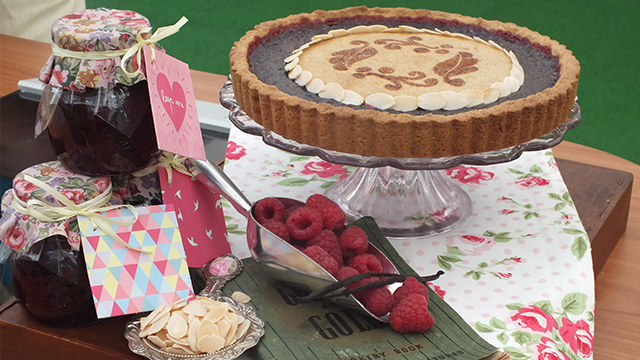
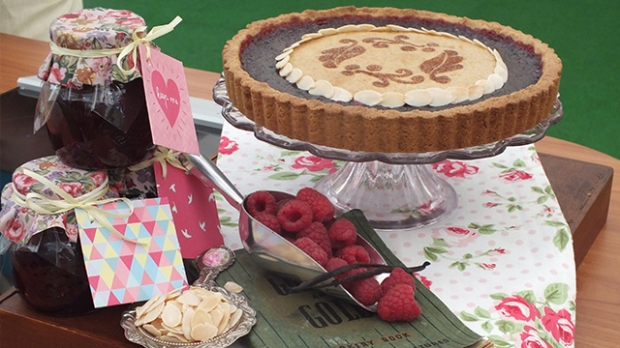
I have always lover the traditional Linzer tart its one of the worlds oldest recorded recipes. This inspired me to take something old and make it new, well the best way I know how.  Off course if you don’t like raspberry you can make strawberry jam or even plum it all works beautifully together. The pastry is lovely to work with and no rolling pin required.

“Spiced Raspberry Tart”

13_mariatart

1146536_434098646706378_1619758067_n

Shane’s in love with raspberry jam!

16282_434098886706354_100309812_n

We are all enjoying some of Monique’s left over figs…..delicious!

Technical Bake Time!

556466_10151625728674150_250230391_n

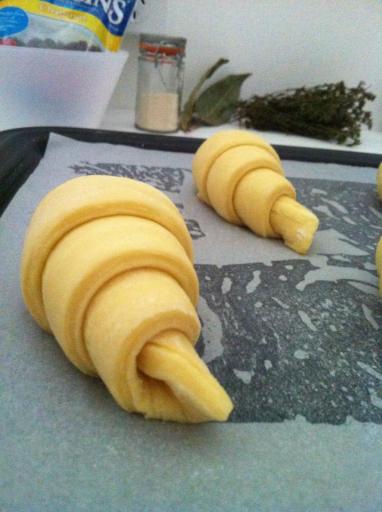
The dreaded technical bake was soon to follow, the French crescent moon the Croissants!  Even though it caught us by surprise it was the first time I felt a little at easy. This was the first technical bake that I had made at home and even though it was almost 10 years ago for the first time I felt a little confident…..as scary as that sounds.  My croissants didn’t fail me they were golden and flaky all puffed up Im sure I made this french pastry proud. Judgment time and they got “1st” YAY!

1150137_10151625733499150_26372314_n

The ALL important “SHOWSTOPPER”

20130817_172631_4_bestshot

“STRUDEL” I think I can still hear host Shane saying “STRUDEL”

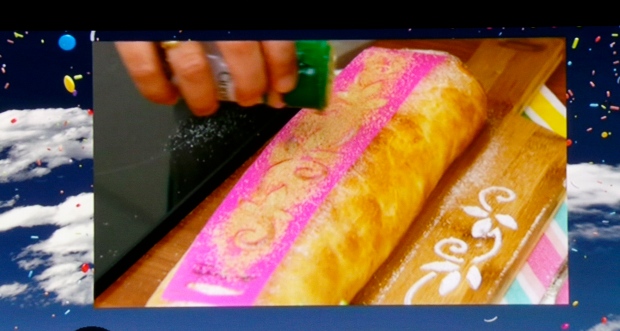
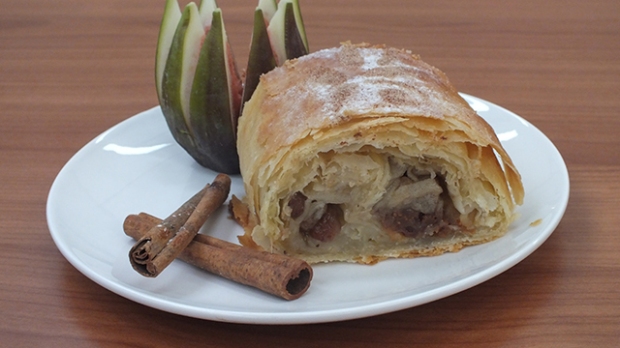
I had watched my grandmother and mother use the method of stretching the wet dough to make these supper fine sheets it take patience and a very large table. But in my wisdom I chose to make the Filo Pastry the traditional way using a very thin long rolling pin and a copious amount of cornflour which helps to stop the pastry from sticking together. Once this process has been completed each sheet is coated in golden melted butter to help the sheets cook and crisp through as well as add enough flavour to appease and French pallet. The real challenge with a strudel “no-mater” what the filling is the final presentation and I think a simple stencil and some sugared cinnamon was just the touch my strudel needed.

20130820_212322

546896_10151625752319150_1877066558_n

4_studdlefig

RECIPE!

20130817_173926_2

Gluten Free – Spiced Raspberry Tart

Ingredients

Serves 10 – 12
For the pastry
  • 1 cup almond meal
  • 250g gluten-free flour
  • pinch of baking powder
  • pinch of bicarbonate of soda
  • 3 teaspoons icing sugar
  • ½ teaspoon ground ginger
  • ½ teaspoon ground cinnamon
  • ½ teaspoon ground cloves
  • 200g butter
  • 1 free-range egg yolk
  • 1 vanilla pod
  • zest of 1 lemon
For the jam
  • 1kg raspberries
  • 1kg A1 sugar
  • 3 tablespoons water
  • 3 tablespoons lemon juice
  • ¾ x 50g packet Jamsetta (pectin)
To finish
  • ½ cup sliced almonds
  • 1 free-range egg yolk, beaten, for the egg wash
  • cinnamon and stencil for dusting
Utensil
  • 1 x 25cm fluted loose-based flan tin

Preparation Method

Place the almond meal, flour, baking powder, bicarbonate of soda, icing sugar, spices and butter into a food processor bowl and process until the mixture resembles breadcrumbs. Add the egg yolk through the feed tube and process until combined. Split the vanilla pod and scrape the seeds into the dough along with the lemon zest.

Place the dough onto a floured worktop and knead lightly until smooth. Cut off one-third and roll into a ball. Shape the remaining pastry into another ball. Wrap in cling wrap and chill for 20 minutes.

Roll out the larger pastry ball. Line the tin, then place it back in the fridge to rest the pastry. (A hint for rolling out this pastry, as it is quite crumbly: spray your worktop with oil. Place a large piece of cling wrap on top and roll the pastry out onto it. This will make it easier to pick up.) Roll out the smaller piece of pastry onto baking paper. Cut a small circle (18cm) to sit on top of the tart. Chill the base and top for 10 minutes.

Preheat the oven to 150°C. Wash the raspberries. Place the sugar in a deep pan and heat in the oven for 6 minutes. Place the raspberries in a separate heavy- based pan with the water and lemon juice. Mash the fruit and add the warmed sugar and Jamsetta, stirring constantly. Bring to the boil and cook, bubbling, for 5—10 minutes. Skim off any scum and discard. (To test if the jam is set, place 3 saucers in the freezer. Once cold, place 1 level teaspoon of jam on the first saucer. If set, the jam should wrinkle once cool; if not continue cooking for a further 3 minutes and test again on a fresh saucer.)

Preheat the oven to 180°C. Fill the chilled pastry case with the jam and cover with the decorated circle of pastry. Place almonds around the circle. Brush the pastry with egg wash and bake for 20—25 minutes. Decorate by sifting the cinnamon over the stencil before serving.

Thank you to judges Kerry Vincent and Dan Lepard

for there wonderful comments and off course being chosen as STAR BAKER.

13_mariatart